

Pick the bow tie that matches your dog's breed. That's the most common advice you'll find, and it's the advice most likely to give you a bad fit. Breed labels describe an average animal that may not resemble yours, and a bow sized by looks can slide, rotate, rub, or tempt a chewer with parts small enough to swallow.
Pet bow ties work when you reverse the order. Measure the neck first, screen the attachment and decorations second, and choose colour last. A premium finish doesn't make a bow tie low risk. The clip, knot, elastic, beads, and bells matter more than whether the fabric is satin or velvet, because those small parts decide whether the bow stays centred, comes off quickly, and survives real wear without becoming a hazard.
Pet Bow Tie Sizes by Neck Size and Pet Type
A bow tie is decoration, not a restraint. Its job is to sit neatly on a properly fitted collar, stay centred for the time you want it worn, and come off without a struggle. That means size comes from neck measurement, not from a breed name on packaging and not from how wide you want the bow to look in a photo.
Breed is a rough starting point at best. Two Cavaliers can differ by several centimetres around the neck, a fluffy Pomeranian measures larger over coat than under it, and a young Border Collie can outgrow a size in weeks. If you buy by breed alone, you'll end up tightening a strap that shouldn't be tightened or accepting a bow that drifts toward the throat. Measure first, then use the breed column below only as a sanity check.
How to Read the Size Chart
Neck girth is taken where the collar normally sits, midway down the neck, with the tape flat against the coat but not compressing it. The ranges overlap in real life because individual pets vary, so the measurement wins over the breed every time. If your reading lands between rows, the chart row that contains your reading is your size, and the bow width in that row is the proportion that will look balanced without covering the chin or ears.
| Size | Neck girth | Typical pets | Bow width |
|---|---|---|---|
| XXS | 15 to 20 cm | Chihuahua, Yorkshire Terrier puppy, kitten | 3 to 4 cm |
| XS | 20 to 25 cm | Pomeranian, Maltese, adult cat | 4 to 5 cm |
| S | 25 to 32 cm | Cavalier King Charles Spaniel, Dachshund | 5 to 6 cm |
| M | 32 to 40 cm | Beagle, Border Collie | 6 to 7 cm |
| L | 40 to 50 cm | Labrador Retriever, Golden Retriever | 7 to 8 cm |
| XL | 50 to 65 cm | Great Dane, Mastiff | 8 to 10 cm |
Most adult cats fall in XS to S, while kittens start at XXS and move up quickly. Don't buy ahead for growth. An oversized bow on a kitten or puppy rotates, dangles where teeth can reach it, and teaches the animal that neckwear is something to fight.
A plain bow that stays put beats a decorated bow that your pet can chew apart.
That point is worth stating plainly because it runs against how these products are sold. A premium looking bow tie trimmed with small beads, buttons, or bells can be riskier than a plain one, because chewable, detachable parts are the hazard. Fabric rarely causes the emergency. The swallowed button does.
Before you buy, make three checks. First, confirm your neck measurement in centimetres and the chart row it falls in. Second, measure your collar width, because a slip on loop made for a narrow collar will bunch or twist on a wide one, and you can compare dog uniform sizes to see how garment sizing by measurement differs from sizing by breed label. Third, confirm whether the bow detaches from the collar. I would not buy a bow you can't remove in seconds.
Measure, Fit and Confirm Before First Wear
The five step sequence below puts measurement before styling, which is the only order that produces a reliable fit.
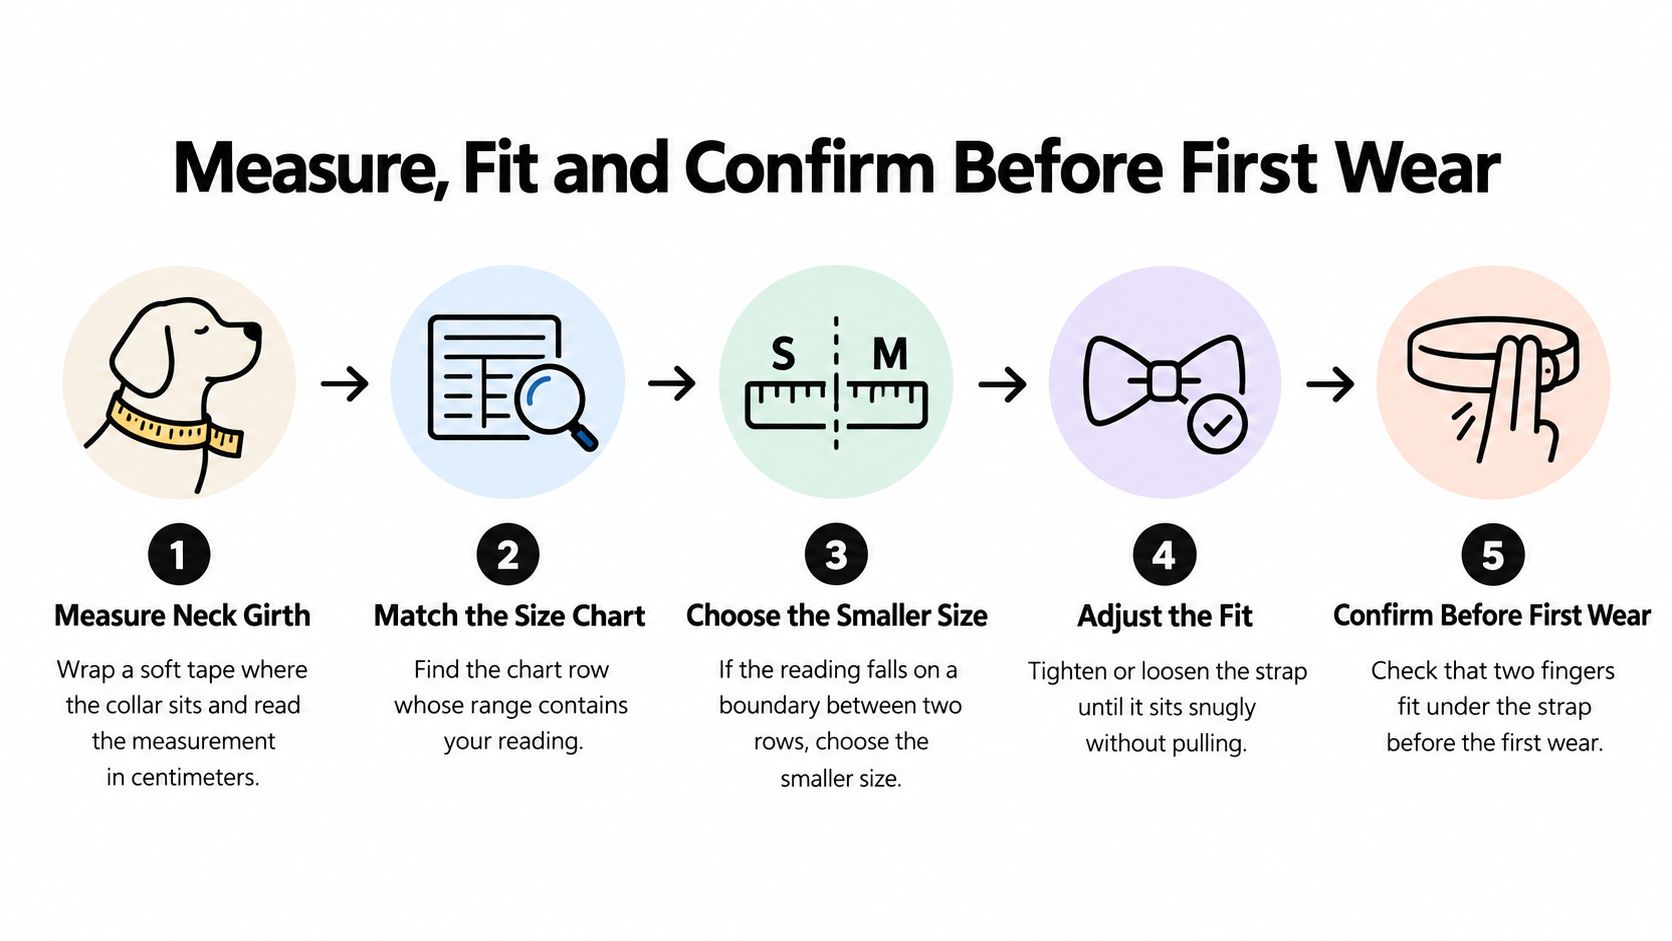
Start with a soft tape measure, the flexible kind used for sewing. A metal tape won't follow the neck, and a piece of string marked against a ruler is better than guessing but worse than a soft tape. Have your pet standing, head in a natural position, and place the tape where the collar sits. Read the measurement in centimetres, then find the chart row whose range contains it. If the reading falls exactly on a boundary between two rows, choose the smaller size. A slightly smaller bow looks tidy and stays centred, while an oversized one droops and swings into the line of sight.
Puppies and kittens need remeasuring every few weeks. Neck girth changes faster than overall weight suggests, and yesterday's correct size becomes today's tight strap without any visible warning from across the room.
The Five Fitting Checks
- Set collar snugness first. Slide two fingers between the collar and the neck. That's your fit benchmark, and the bow never decides how tight the collar should be. If the collar itself is wrong, fix that before adding decoration, and a fuller guide to fitting a dog collar correctly is worth reading if you're starting from scratch.
- Attach to a flat collar. Use a secure, low profile loop or clip on a properly fitted flat collar, centred under the chin and never resting on the throat. The bow should not replace the collar's own fastening system.
- Test for slide and rotation. Push the bow gently left and right. It shouldn't travel toward the throat or spin around the collar. Check the attachment for exposed sharp edges with your fingertip, because a rough clip edge you barely notice will rub the same patch of skin for an hour.
- Confirm clearance. The bow must not obstruct vision, mouth opening, swallowing, ear movement, or front leg motion. Keep it clear of identification tags and leash hardware so nothing tangles or clanks against it.
- Run a five minute supervised test. Let your pet sit, lie down, walk a short distance, and shake. Watch what happens to the bow in each position before you commit to a longer wear.
The video below shows the handling side of this process, which helps if your pet is wiggly during measuring.
Why the Bow Never Carries a Leash
This is a load question, not a style preference. Canine neck research using instrumented models found that collar designs generated approximately 83 to 832 kPa under 40 to 70 N of applied force, with pressure varying substantially by material, profile, and force direction. When pressure can vary that widely from design alone, decoration has no business carrying load. The bow never takes a leash clip, never substitutes for the collar fastener, and never goes on a harness ring that takes leash force.
Before the first real wear, pick the style by use rather than by appearance. Match the bow width to the collar you already own and know fits. A bow bought for a new collar you've never fitted stacks two unknowns at once.
End with the stop rule, and treat it as non negotiable. If your pet paws at the bow, freezes, rubs against furniture, or coughs, take the bow off and reassess before the next wear. Don't coax through it for one more photo. The next session goes better when the first one ends early.
Clip-On, Slip-On and Tie-On Styles Compared
A bow tie is like a name tag. It's useful when it stays where you put it and a nuisance the moment it slides, flips, or ends up under the chin. That comparison is worth keeping in mind because the four common attachment styles differ mainly in how they fail, not in how they look on a product page.
Every style works in a still photograph. They separate themselves in minute ten, when your dog shakes, your cat grooms, or elastic gives up. Judge them on how they attach, how fast they come off, and what goes wrong first.
| Style | How it attaches | Main failure mode | Best occasion |
|---|---|---|---|
| Clip-on bow tie | Spring clip or loop on a flat collar ring | Clip slides toward the throat | Short outings, photos |
| Slip-on bow tie | Elastic band stretched over collar ends | Elastic stretches and loosens | Cats with breakaway collar, short wear |
| Tie-on bow tie | Fabric tie knotted around the neck | Knot loosens or compresses the neck | Supervised photo sessions only |
| Detachable collar ring | Sewn loop or D-ring with quick-release bow | Ring can rotate or snag | Daily wear with removal on schedule |
Clip on bows are the fastest to fit and remove, which makes them practical for grooming appointments and quick photos. The trade off is grip. A smooth clip on a smooth collar migrates, and once it reaches the throat it presses where you least want pressure. Check position every few minutes, not just at the start.
Slip on bows thread onto the collar itself, so there's no separate hardware to lose. Elastic versions are gentle and quick, but elastic is a consumable. It stretches with heat, washing, and repeated fitting, and a bow that fitted snugly last month may hang loose today. Test the tension before each wear by sliding the bow along the collar. If it moves freely, it's done.
Where Each Style Earns Its Place
Tie on bows look the most traditional and give you the least control. A knot tied to look neat can be tied tighter than intended, and a knot tied loosely works itself looser. There's no quick release in an emergency, just your fingers and a possibly panicking pet. I would keep tie on styles for short, supervised photo sessions where you're within arm's reach the whole time.
The detachable collar ring is the strongest all rounder. A sewn loop or D ring on the collar holds a quick release bow that comes off in one motion for sleep, exercise, or rough play, then goes back on for the next outing. Its weakness is rotation on a loose collar, which is really a collar fit problem showing up as a bow problem.
For cats, clip on or slip on styles paired with a breakaway collar are the sensible combination, because the collar's release function matters more than the bow's grip. Never attach a bow in a way that defeats the breakaway mechanism.
Rule of thumb: the more a style depends on a knot or on stretch, the shorter the wear time should be.
Fabrics and Care That Decide How Long It Lasts
Fabric choice is a comfort decision before it's an appearance decision. PDSA guidance on dressing up pets warns that clothing or accessories can interfere with normal movement, grooming, and temperature regulation, that loose items can become caught, and that tight items may cause distress or overheating. For a bow tie, that translates into concrete buying criteria: lightweight construction, breathable or low abrasion backing, smooth seam finishing, and colourfast materials that won't bleed dye onto a light coat.
| Material | Feel and breathability | Realistic wear time | Washing | Watch for |
|---|---|---|---|---|
| Cotton | Soft, breathable | Supervised all-day wear | Machine wash cold, air-dry | Fading if not colourfast |
| Polyester blend | Smooth, holds shape, low breathability | Short sessions | Gentle cycle, air-dry | Static and pilling |
| Satin | Slick, low friction, warmer | Photos and events | Hand wash | Snags and fraying at edges |
| Velvet | Heavy, warm, pile traps hair | Short photo sessions | Spot clean | Traps dirt, can cause overheating |
| Neoprene | Water-resistant, thick, stretchy | Wet-weather walks only | Wipe clean | Stiffness and heat retention |
Cotton is the workhorse. It breathes, it washes, and it forgives daily use. Polyester blends hold a crisp bow shape for events but trap more heat, so keep sessions short. Satin's low friction is kind to long coats, though one snag on a rough edge can pull a visible run across the bow. Velvet photographs beautifully and collects every hair and crumb in reach, which is why it's a minutes only fabric. Neoprene makes sense in rain and nowhere else, since thickness and heat retention work against comfort indoors.
Hardware and the Care Routine
Hardware deserves the same scrutiny as fabric. Plastic side release buckles and smooth metal clasps are preferable to sharp or exposed hooks, which can catch coat and scratch skin. Run your finger over every edge before the first wear and after every wash. Metal that felt smooth when new can develop rough spots, and a clasp that needs force to open will need more force when you're in a hurry.
Care is simple if you keep it routine. Remove the bow from the collar before washing so hardware doesn't batter the fabric. Wash cold on a gentle cycle, following sensible practice for preventing fabric shrinkage and colour bleeding, then air dry away from direct heat, which degrades elastic faster than wear does. At each wash, inspect for stretched elastic, frayed stitching, and loose embellishments. Pull gently on any bead or button. If it moves, the bow is finished.
Retire damaged pieces immediately rather than repairing them for one more use. A detachable design helps here too, since you can pull the bow for sleep, hot weather, grooming, or the first sign of scratching without refitting the whole collar. Treat the bow tie as supervised styling equipment, and it'll last. Treat it as an all day fixture, and both the bow and your pet's patience wear out together.
When a Pet Bow Tie Becomes a Hazard
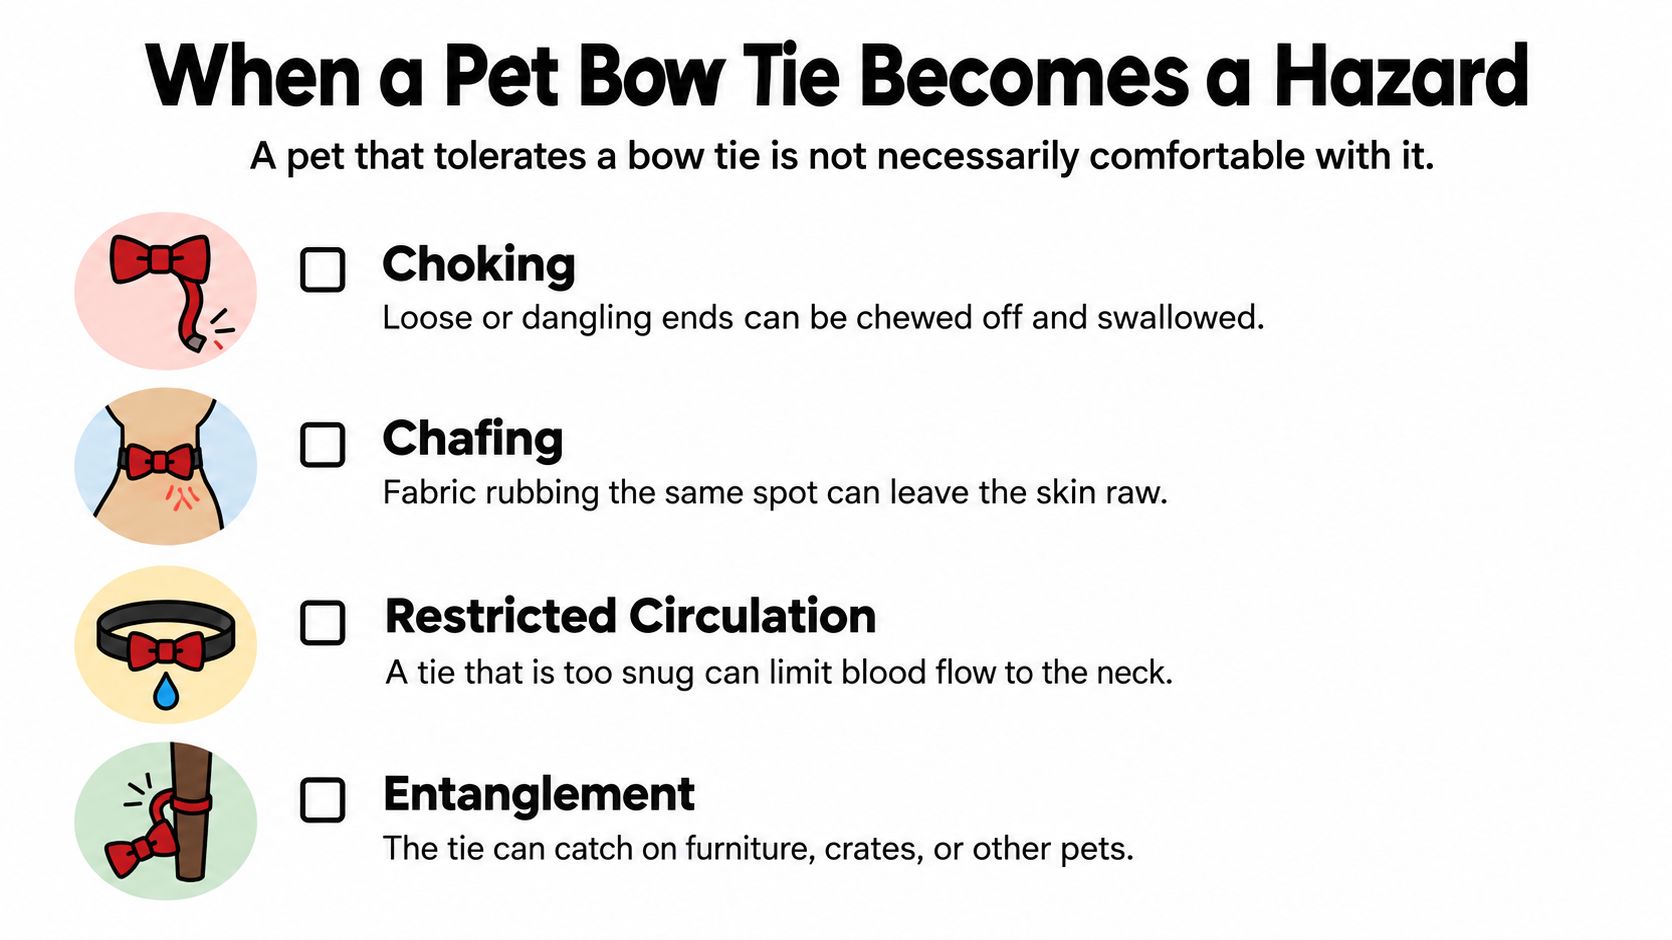
A premium-looking bow tie is not automatically a low-risk one. The small decorative parts and the way the bow attaches to a collar can matter more than the fabric. A pet that tolerates an accessory is not necessarily comfortable wearing it; stillness can be mistaken for acceptance. Follow One Health guidance on safe and comfortable pet clothing: your pet should be able to breathe, vocalize, move, lie down, groom, and eliminate normally. A loose or poorly fitted bow can cause choking, chafing, restricted circulation, or entanglement.
Screen for those four hazards before each wear.
Keep the bow separate from restraint. Pulling on a narrow collar can create harmful pressure on the neck, so never attach a leash to the bow or use it in place of the collar fastener. A sturdy-looking decoration is still decoration, not load-bearing equipment.
The Attachment Screen
Check the bow in your hand before putting it on your pet:
- Slide test: Push the loop or clip along the collar. It should not travel toward the throat.
- Rotation test: Check that the bow stays centred under the chin after your pet moves, not only just after fitting.
- Edge test: Feel for exposed sharp edges, rough seams, or pin backs that could reach skin.
- Decoration test: Confirm beads, buttons, and bells are firmly secured. Remove them for puppies, kittens, and known chewers.
Small decorations can pose more risk than the fabric. A loose bell or button may be chewed off and swallowed, so remove the bow if any part shifts or comes loose.
Remove It Now
End the session if your pet shows signs of discomfort or stress. Do not wait for the behaviour to intensify or assume your pet will get used to the bow.
- Pawing at the neck: Repeated attempts to hook the bow off.
- Freezing: Standing stiffly instead of moving normally.
- Rubbing: Dragging the neck along furniture, flooring, or your leg.
- Scratching: Persistent scratching at the bow or collar line.
- Coughing or gagging: Possible throat pressure or difficulty swallowing.
- Escape attempts: Backing away, bolting, or hiding when the bow appears.
- Heavy panting: Possible stress or overheating, especially indoors.
Remove the bow during leash corrections, rough play, crate time, unsupervised periods, and car travel near a car seat harness. Take it off for any activity where it could snag. For everyday accessory precautions, follow this pet safety guidance for everyday accessories.
If you cannot watch it, your pet should not be wearing it.
Supervision is part of safe wear, not an optional extra. If you cannot keep an eye on your pet, remove the bow.
Styling Ideas for Photos and Events
A polished bow tie is not automatically low risk. For photos and events, the small decorative parts and the way the bow attaches matter more than the fabric, so keep styling brief, supervised, and separate from everyday wear.
The history of dog fashion traces decorated collars and dressed companion animals across different periods, from a collar in the tomb of Maihar Piri to ribbons and bows on Victorian lap dogs. Today, holiday photos offer a simple reason to dress up a pet, but the same rule applies: make it a short session, not an all-day outfit.
Three Occasions That Work
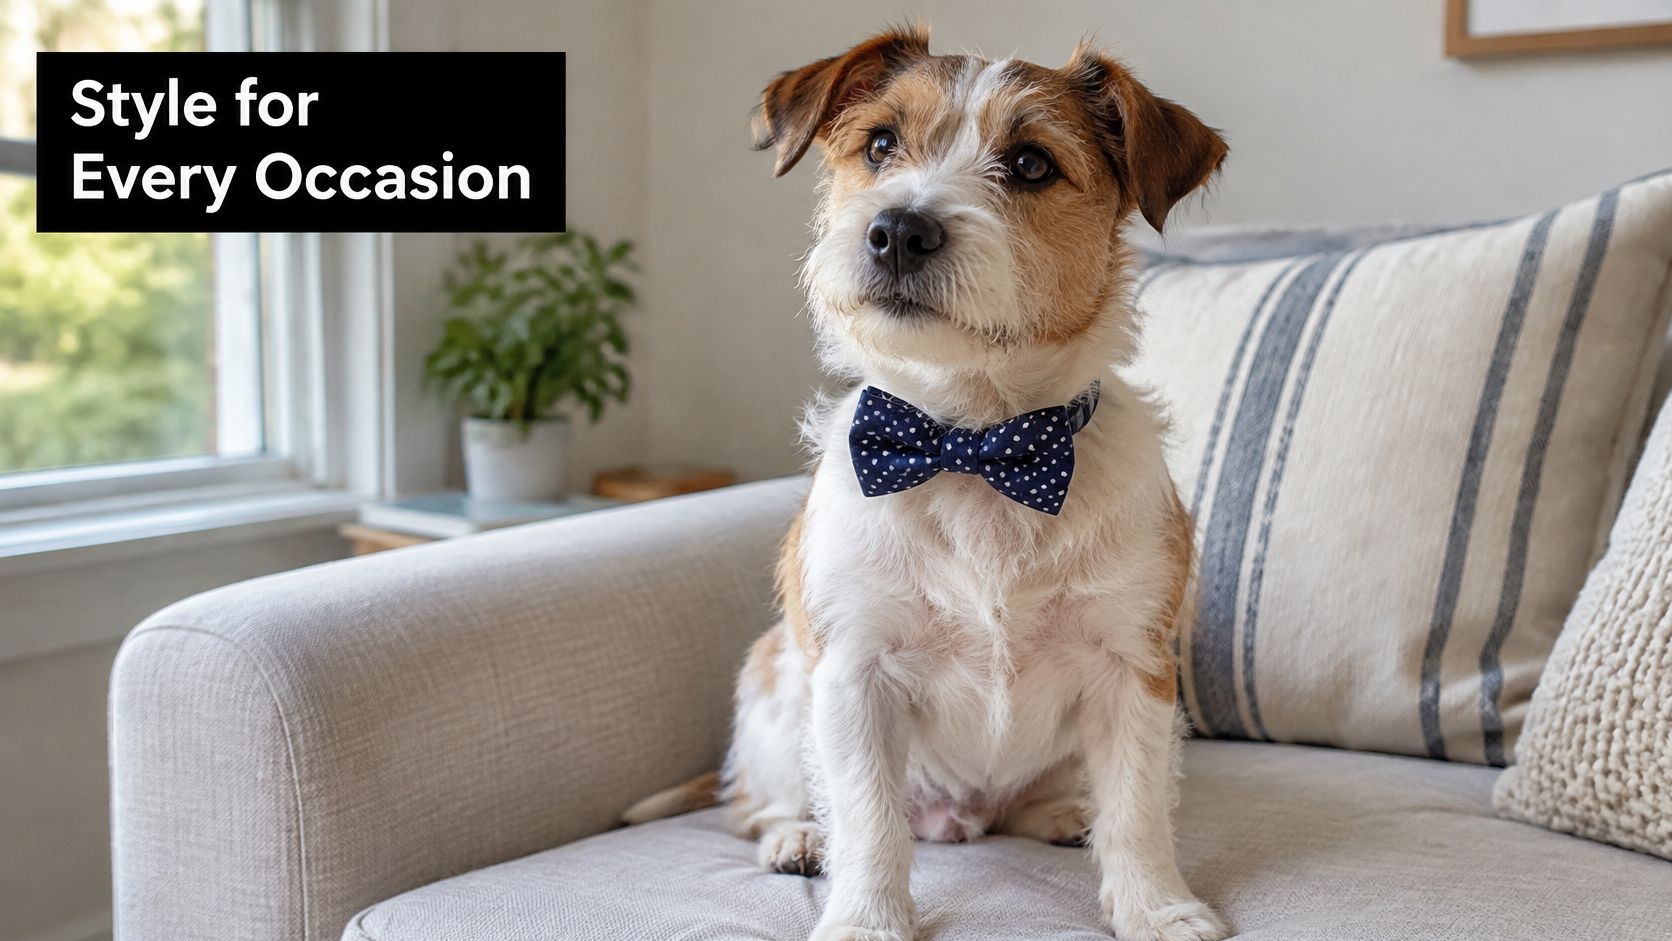
For a holiday photo, use a flat collar your dog already wears comfortably. Take the pictures in one brief session, then remove the bow before guests arrive or your attention shifts elsewhere. A familiar collar and a short session keep the styling simple.
At a birthday dinner, keep the bow clear of the leash attachment and remove it once food scraps are on the floor. A bow that gets dragged through food can become a tempting chew target.
For a matched look, choose colours that suit your own outfit rather than relying on a novelty print. These ideas for how to coordinate outfits with your dog can help you repeat colours without matching every detail. You can also browse designer collar and leash combinations for examples of coordinated sets.
Pairing Rules
- Match widths: Choose a bow width that sits in proportion to the collar, rather than overhanging it.
- Repeat two colours: Carry two colours from the collar or harness into the bow for a coordinated look.
- Keep harnesses decorative only: A neoprene harness can be part of the outfit, but do not attach the bow to its leash-loaded ring.
- Remove for travel and rest: Take the bow off before car travel and crate time.
- Style the session, not the day: Wear the bow only while you can supervise, then return to a plain collar.
For walks, switch back to a plain waterproof flat sport collar such as a Waterproof Poly-Flex collar, which keeps the fit simple and the leash hardware clear in wet weather. Keep the bow for the photo or event, and remove it when that short session ends.
Measure your pet's neck, choose a detachable bow that fits the collar, and use a flat collar suited to daily walks. For a coordinated setup, explore Nandog's designer collar and leash combinations alongside its other pet accessories.