


Rain is tapping the glass, your dog is spinning on the doormat, and one harness buckle has somehow disappeared beneath a scatter of treats. You get it on by force, clip the leash, and step outside with a dog already buzzing. The next walk becomes a workout for your arm.
Putting on a dog harness should be a quiet transition, not a wrestling match. The way you introduce the harness, position each strap, and check the fit affects comfort, movement, escape risk, and your dog's willingness to cooperate. The small details matter most around the shoulders, chest, armpits, and rib cage.
The Moment That Sets the Tone for Every Walk
I've seen the same doorway scene across breeds and households. A mid-sized terrier mix pirouettes while the owner reaches for the buckle. The harness gets pulled over the dog's head, one strap twists under the elbow, and the leash is clipped before anyone checks whether the chest piece is sitting on the breastbone.
The dog hasn't learned that the harness itself is unpleasant. The dog has learned that the harness predicts hurried handling, restraint, and a rush toward the door. That association can make every future fitting more difficult.
A calmer routine changes the sequence. Ask for a pause, bring the harness into view, reward the dog for standing or looking at it, and handle one part at a time. The outdoor reward still arrives, but calm cooperation becomes part of the path to it. Langford Vets recommends a gradual desensitization process, beginning with brief leash attachment paired with treats and extending the duration only as the dog remains comfortable. Their guidance also warns against pulling or moving the leash during early acclimation, because pressure can create avoidance rather than confidence. Read the Langford Vets harness-training guidance for the full progression.
Practical rule: If the dog is twisting, freezing, or grabbing at the harness, slow the routine down before adding the leash.
The construction determines the handling sequence. An overhead harness passes over the head and usually clips along the back. A step-in harness asks the dog to place its front paws into two openings before the panel is lifted and secured. A no-pull harness typically adds a front chest attachment, so the chest pad must be centred before the leash goes on.
Those styles can all work. None works well when it's loose, twisted, or positioned across the shoulder joint.
Overhead, Step-In, and No-Pull Harnesses Compared
Identify the construction before you attempt to fit it. Owners often follow a familiar routine with an unfamiliar design, then blame the dog when the openings or buckles don't line up.
| Harness Style | How It Goes On | Best For | Main Drawback |
|---|---|---|---|
| Overhead | Loosen the neck opening, guide it over the head, bring the chest strap under the body, and clip it on the back | Dogs comfortable with handling over the head, adjustable everyday walking | Nervous dogs may resist the head opening, and a loose fit can allow backing out |
| Step-in | Lay the harness flat, guide the front paws into the openings, lift the panel over the back, and buckle it above the spine | Short-backed dogs and dogs that dislike a strap passing over the face | It can require more handling of the front legs and may be awkward for stiff seniors |
| No-pull | Put it on like an overhead or Y-front harness, then centre the chest section and use the front ring or dual attachment | Dogs needing additional steering support during training | Incorrect chest placement can interfere with shoulder movement or shift toward the throat |
A step-in design may suit a short-backed dog because the panel can sit compactly around the rib cage. Deep-chested dogs often need an overhead or Y-front no-pull construction that leaves the shoulder blades clearer, rather than a broad strap that rides into their movement path. The correct choice depends on the individual dog's proportions, not its breed label.
The phrase no-pull also describes a handling feature, not a guarantee that pulling will stop. A front ring can change how the leash influences the dog, but it won't replace training or correct a harness that has shifted out of position. For a closer look at front-clip and dual-attachment designs, see this guide to no-pull dog harness options.
Style changes the order of operations. With an overhead model, the neck opening comes first. With a step-in model, the paws must be placed accurately before the back panel is lifted. With a no-pull model, the front connection deserves a separate fit check because it sits close to the sternum and shoulder line.
Putting On Each Harness Type Without the Fuss
Start with the harness resting in your hand, not already pressed against the dog. Let the dog sniff it, reward calm attention, and keep the first contact brief. Touch, treat, lift, praise, and repeat at the dog's pace. If the dog turns away, pause rather than following with the harness.
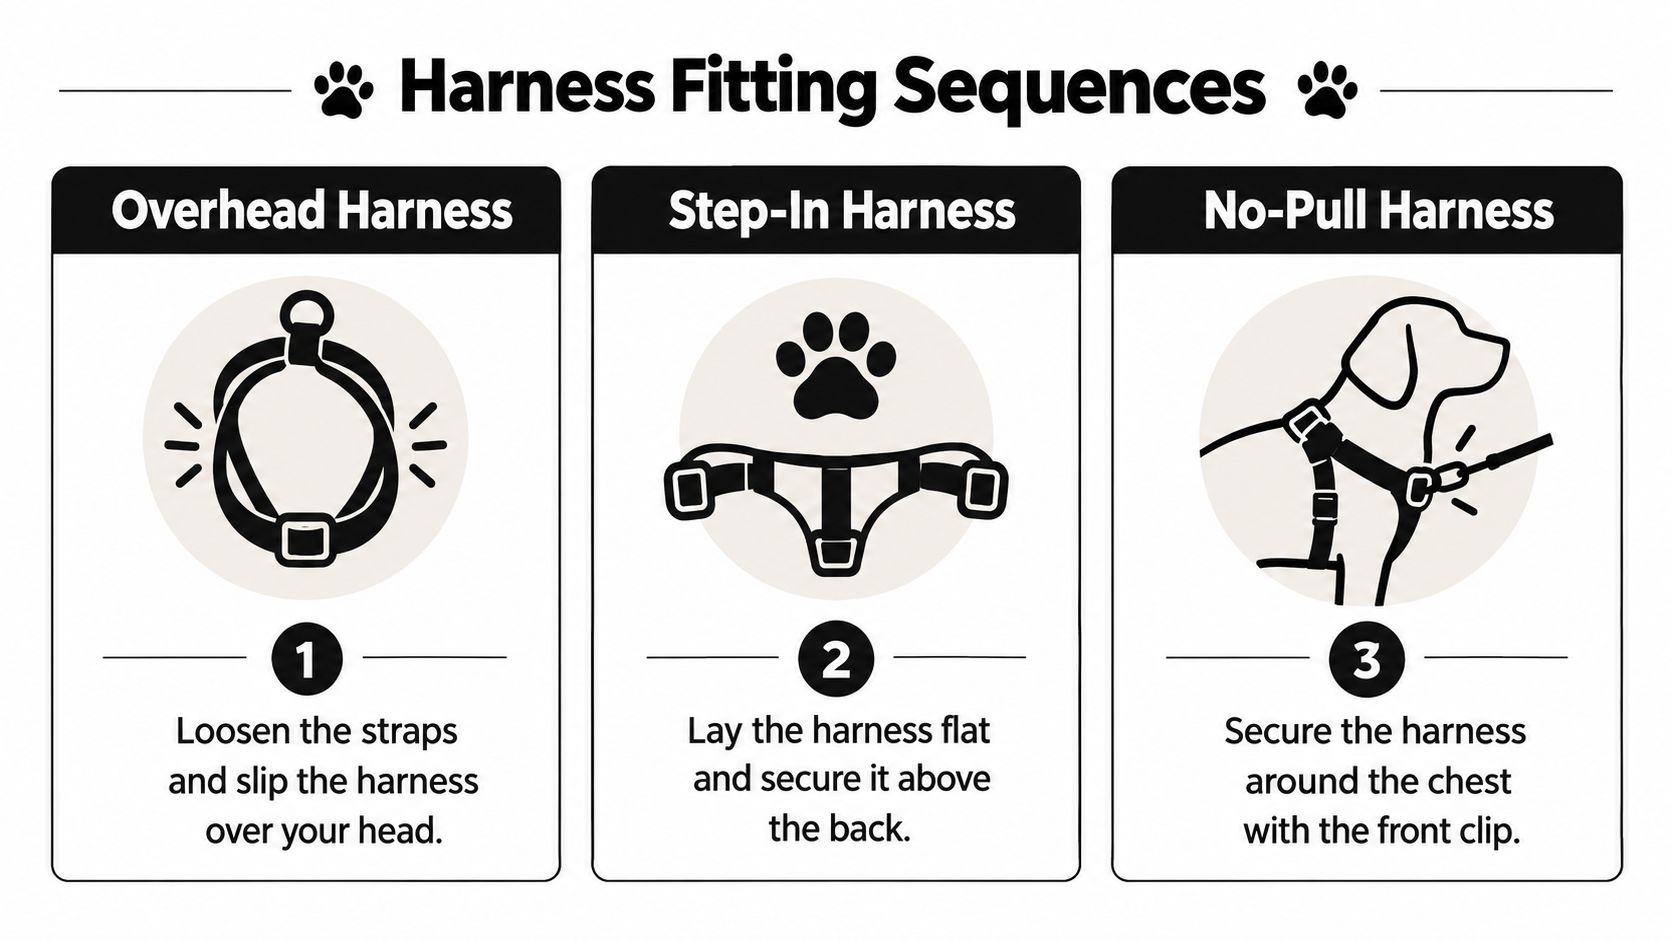
Overhead harness
Loosen every adjustable strap before starting. Hold the neck opening wide and bring it toward the dog's head from the side, rather than dropping it down over the crown. A side approach gives the dog a clearer view of your hand and reduces the sudden sensation of something closing over the face.
Once the opening rests around the neck, check that the front or Y-shaped straps point down toward the breastbone. Reach under the belly and bring the chest strap upward without dragging it through the armpit. Clip the buckle on the back, then make a rough adjustment before attaching the leash.
The common error is tightening the neck area first. That can pull the front straps upward, placing pressure too close to the throat and leaving the lower body loose. Set the chest position first, then adjust the surrounding webbing.
Step-in harness
Lay the harness completely flat, with the inside facing upward and the back clip easy to identify. Guide one front paw into its opening, then the other. Don't lift the dog's body or force a leg through a strap that's folded underneath.
Bring the central panel upward over the chest and back, keeping both sides even. The buckle should meet above the spine, and the webbing should lie flat rather than forming a twist across the ribs. A treat delivered after each cooperative movement helps the dog keep its attention on you.
Step-in designs can be useful for dogs that dislike an object passing over their face, but they aren't automatically easier. Some dogs dislike having their feet handled, and a stiff or arthritic dog may find repeated paw lifting uncomfortable. If the dog withdraws a leg or braces, stop and reassess rather than increasing pressure.
No-pull harness
Treat a Y-front no-pull harness as an overhead harness with an additional alignment task. Bring the neck section over the head from the side, settle the straps around the rib cage, and locate the front chest ring before clipping the leash.
The chest pad or connecting strap should be centred over the sternum. It shouldn't sit against the throat, drift toward one shoulder, or hang loosely between the front legs. Secure the back buckle, adjust both sides evenly, and only then choose the front ring, back ring, or dual connection recommended by the harness maker.
Avoid moving the leash during the first fittings. The early goal is comfort with the equipment, not control through pressure. Once the dog can stand, walk, and take treats normally, practise a few quiet steps indoors before heading through the door.
The Two-Finger Rule and What Good Fit Really Looks Like
A size chart gives you a starting point. It doesn't tell you whether the harness is sitting on the right part of the body.
Measure the dog's girth behind the front legs, where the rib cage is fullest, rather than relying on back length or neck size. That measurement is more useful for choosing the general size, but adjustment still has to happen on the dog. A harness can match the girth range and still press into the armpits, cross the shoulder blades, or leave a gap large enough for an escape.
The practical benchmark is the two-finger rule. You should be able to slide one to two fingers between the webbing and the dog's body, as recommended in the recent harness-fit review summarized in the verified research. The strap should feel secure without compressing the ribs, and it shouldn't move freely when you rotate it gently.
Coat changes the feel of that test. On a short, fine coat, your fingers should meet the body quickly. With a dense double coat or heavy furnishings, part the fur and check the webbing against the body rather than measuring only the surface of the coat. A loose harness hidden in thick fur can still allow a dog to reverse out of it.
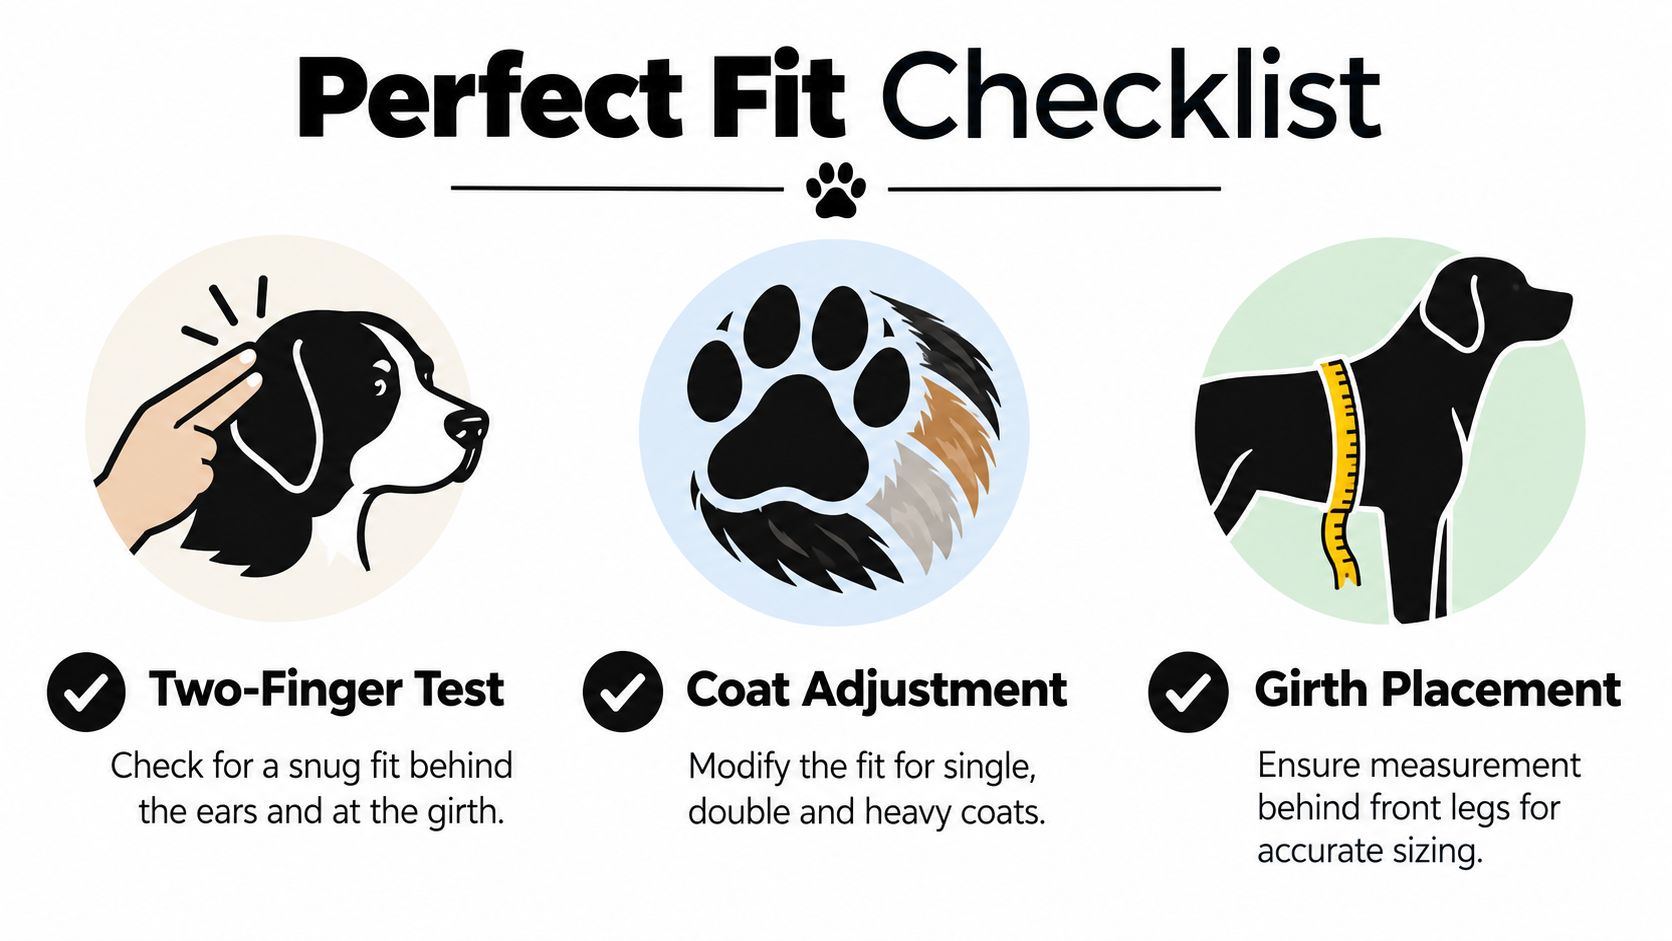
Shoulder clearance matters
Peer-reviewed research involving 66 dogs found measurable locomotion differences among three popular harness types and recommended treating each dog individually when selecting and fitting a harness. The same research line indicates that placement near the shoulder joint can affect movement more consistently than the brand or general style, making shoulder clearance a practical priority rather than a cosmetic detail. See the peer-reviewed study on harness design and canine biomechanics for the research basis.
A correctly positioned Y-front should rest at the breastbone, not at the throat. The side straps should follow the rib cage without cutting into the front of the shoulder or rubbing behind the elbows. For a more detailed measurement and adjustment reference, use this dog harness fitting guide.
Before clipping the leash, run your hands over the harness:
- Check the chest: Confirm the centre strap or pad is on the sternum.
- Check the shoulders: Move each front leg forward gently and watch for strap interference.
- Check the armpits: Feel for pinching, gathered webbing, damp fur, or redness.
- Check the back edge: Make sure it isn't pressing into the spine or folding inward.
- Check escape points: Test a gentle backward motion while holding the harness, not the leash.
Helping Puppies and Nervous Dogs Accept the Harness
A puppy may run from a harness because it looks unfamiliar, not because it has decided to be difficult. The same applies to a rescue dog that has experienced rough handling or lacks a history of cooperative dressing.
Put the harness on the floor near the food bowl. Don't reach for the dog with it. Reward a glance, a sniff, or a step toward the harness, then put it away. Later, touch the dog's shoulder with the harness, reward, and stop. The harness becomes part of the environment before it becomes something worn.
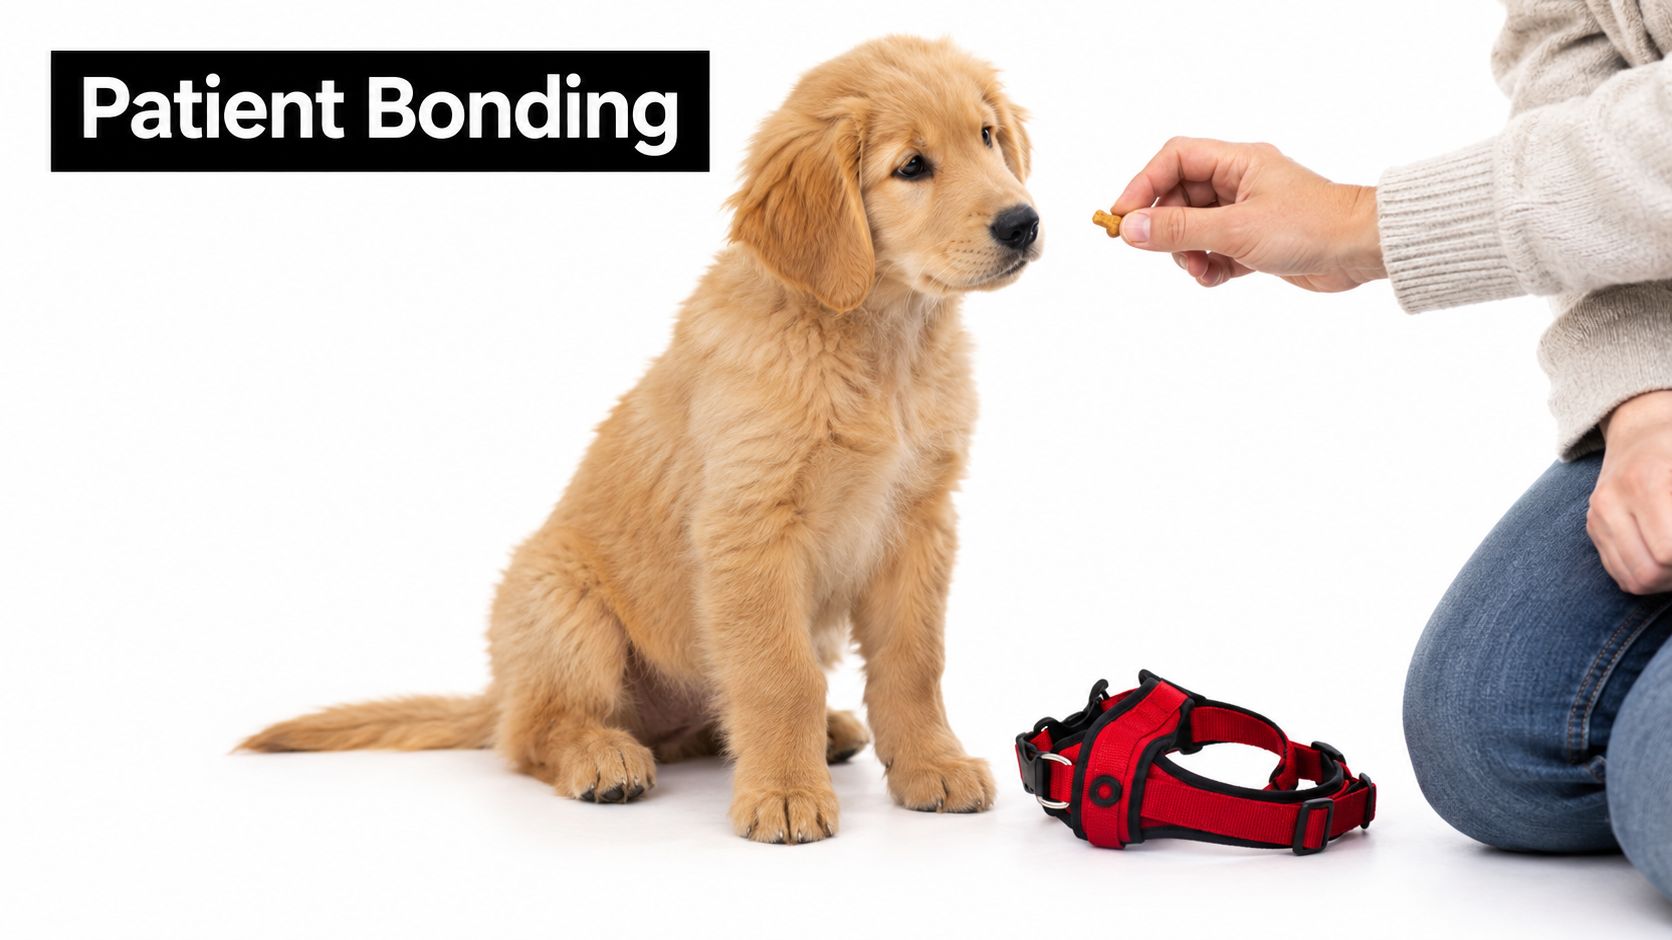
When the dog accepts touch, guide the opening near the body without putting it on. Then fit it for a few seconds, deliver several small treats, and remove it while the dog is still relaxed. Langford Vets describes this kind of stepwise desensitization, progressing from introducing the harness to brief leash attachment, then gradually increasing duration before expecting loose-leash walking.
Watch the dog's face and posture. Lip licking, a turned head, whale eye, freezing, tucked posture, or sudden scratching can all tell you that the session has become too difficult. These signals don't mean you should push through. They mean the next repetition needs to be easier.
A common mistake is forcing the harness over the head because the dog is already late for a walk. That may get the equipment on today, but it can make the doorway routine harder tomorrow. A soft, adjustable option designed for growing dogs, such as the style discussed in this mesh puppy harness guide, can be considered alongside the dog's comfort and changing measurements.
Use short sessions consistently. Many puppies settle within two to three weeks of regular brief practice, while rescue dogs may need several months, depending on their history and level of fear.
Once the dog is wearing the harness comfortably, practise indoors before adding outdoor distractions.
Fitting Deep-Chested, Senior, and Escape-Prone Dogs
Generic size charts fail most obviously on unusual bodies. A deep-chested dog may match the listed girth while the harness still slides forward because the rib cage tapers sharply behind the chest. A senior dog may have a familiar measurement but less muscle around the shoulders, a stiff gait, or discomfort when a strap crosses an arthritic joint.
| Body Type | Key Sizing Issue | Recommended Feature | Placement Note |
|---|---|---|---|
| Deep-chested dog | Girth can conceal a sharp taper behind the ribs | Adjustable Y-front, long chest panel, or carefully fitted overhead design | Keep the front strap on the sternum and away from the throat |
| Senior dog | Reduced muscle and limited shoulder mobility can make lifting uncomfortable | Step-in construction or wide adjustability with minimal shoulder crossing | Avoid straps that press into arthritic shoulder movement |
| Escape-prone dog | A loose back opening may widen during backward movement | Martingale loop, double-buckle design, or belly-band configuration | Close the back gap without tightening across the chest |
| Growing puppy | Body shape changes quickly | Multiple adjustment points and frequent fit checks | Recheck the webbing as the puppy's coat and body change |
Sighthounds and similarly shaped dogs need more than a single tape measurement. Check how the harness behaves when the dog backs up, turns sharply, and lowers its head. A Y-front is useful only if the front junction remains on the breastbone instead of sliding into the trachea.
For seniors, minimise lifting where possible. A step-in harness may reduce the need to pass equipment over the head, but lifting each paw can also be uncomfortable, so watch the dog's response. The best design is the one that allows calm dressing without forcing a painful range of motion.
Escape artists need a security check after fitting. A martingale loop or belly strap can close the gap behind the ribs, but it must not restrict breathing or compress the abdomen. Test the harness in a quiet room before relying on it near traffic, other dogs, or an open gate.
The broader research synthesis is clear on one point. No single harness is universally superior, because individual fit determines the result.
Troubleshooting and Caring for Your Harness
Most harness problems leave a physical clue. A dog that suddenly shortens its stride may be dealing with shoulder interference. Redness behind an elbow usually points to rubbing, while repeated backing up suggests that the back opening or belly strap isn't secure enough.
Reset the harness instead of dragging it around the dog's body. Unbuckle it, lay it flat, and put it on again with the chest section centred. If one side is tighter, adjust both sides in equal increments so the front plate doesn't slide toward the shoulder joint.
| Problem | Likely Cause | Useful Fix |
|---|---|---|
| Harness rides into the armpit | Twisted webbing or a low chest strap | Unbuckle, flatten the harness, and reposition the side straps |
| Sternum rubs | Chest pad is too low, narrow, or shifted | Centre it on the breastbone and check movement before walking |
| Dog backs out | Excess looseness around the rib cage or back | Adjust the belly section or use a suitable security loop |
| Chest plate reaches the shoulder | Uneven straps or poor placement | Shorten the belly strap gradually and balance both sides |
| Buckle pinches | Webbing is folded beneath the closure | Open the buckle and smooth the strap before refastening |
Choose the attachment point according to the harness design and the dog's current training needs. A front ring can help redirect a pulling dog, while a back ring may be appropriate for a dog already walking calmly. Neither attachment compensates for a harness that shifts when the dog moves.
Clean the harness according to its materials. Hand-wash mesh and neoprene with mild soap, use a cold gentle cycle for rugged nylon when the care label permits, and air-dry away from direct heat. Heat can weaken or distort some materials.
Inspect the stitching, buckles, adjustment sliders, and D-rings monthly. Retire the harness when the webbing frays, the buckle no longer locks cleanly, or the ring shows damage. A product that looks acceptable at the door can still fail under sudden load. The Center for Pet Safety's 2011 pilot crash testing reported a 100% failure rate across the harnesses tested, helping shift vehicle restraint discussions toward measurable performance rather than appearance or convenience. The findings and later safety context are summarized in this PubMed record on canine vehicle restraint.
Nandog Pet Gear offers thoughtfully designed harnesses and everyday accessories that combine comfort, function, and a polished look for dogs living active urban lives. Visit Nandog Pet Gear to explore harnesses, leashes, car-travel gear, and other essentials, then choose the equipment that lets you fit your dog carefully and start each walk calmly.