

Buy the plushest seat and put it up front so your dog can see you. That's the advice repeated in most shopping guides, and it's the advice to question first. A raised, padded seat can keep a small dog contained and calmer, but containment isn't collision protection, and the front seat adds airbag risk.
A useful dog car seat for small dogs has a narrower job. It should fit your dog's current weight, anchor flat in the rear, connect to a harness rather than a collar, and help you keep your eyes forward. Whether it can also protect your dog in a crash is a separate claim that needs separate evidence. Work through fit, placement, installation, and travel training in that order, and the fabric choice gets much easier.
Size and Weight Bands for a Small Dog
Don't shop by the word small. One brand uses it for a 6 lb Chihuahua, another for a stocky dog three times that weight, and the internal floor space changes with every design. Start with a scale, not a breed label or a photo of a dog who looks like yours.
Weigh your dog this week, with the harness on if that's how you'll travel. Then match that number to the band below and check the printed limit on the exact seat you're considering.
Small-dog weight bands and seat fit
| Weight band | Example dogs | Seat category | Fit check |
|---|---|---|---|
| About 2 to 8 lb | Many Chihuahuas and toy Poodles | Compact low-wall booster | Can turn and lie down without standing on the rim |
| About 8 to 15 lb | Many Yorkies, Maltese and Pomeranians | Standard small booster | Full turn and lie-down with little spare throw space |
| About 15 to 18 lb | Many Cavaliers and smaller Pugs | Carrier or small seat, per the label limit | Confirm the label covers current weight; carrier guidance often stops near 18 lb |
| About 18 to 30 lb | Larger Pugs, some Shih Tzus, smaller French Bulldogs | Safety seat only if the stated limit covers current weight | Safety-seat guidance commonly stops near 30 lb; remeasure as the dog grows |
The Lightest Dogs Need Containment Without a Climb
Toy and teacup dogs around 2 to 8 lb, including many Chihuahuas and toy Poodles, get lost in a roomy booster. If the walls are too high, a curious dog stands on the rim to see out, which puts weight exactly where the seat is least stable. A compact, low-wall booster works better because your dog can sit, peek over the edge, and still curl up on the floor of the seat.
Don't assume a Chihuahua always belongs in the first row. A lean adult and an overweight adult of the same breed can land in different bands, so the scale reading chooses the row. Puppies need a reweigh as they grow, because a seat that fit at four months may be over its limit before the first birthday.
The Middle Bands Need Turning Room
Dogs around 8 to 15 lb, such as many Yorkshire Terriers, Maltese, and Pomeranians, need enough floor to make a full turn without climbing the side. Watch for a dog who can only face one way or who perches with front paws on the rim. That's a floor that's too small, even if the weight limit looks generous.
At 15 to 18 lb, many Cavalier King Charles Spaniels and smaller Pugs reach the point where carrier and booster categories overlap. Read the limit carefully. If the label stops below your dog's weight, the fact that she can squeeze in doesn't make it a fit.
Pugs cause the most confusion here. Most weigh about 14 to 18 lb, so most fall in the 15 to 18 lb band, and only heavier individuals move toward the top band. Use your individual dog's weight, not the heaviest Pug you've seen online.
Near the Top Limit, Stop Guessing
Dogs approaching 30 lb, such as larger Pugs, some Shih Tzus, and smaller French Bulldogs, sit at the top of common small-seat guidance. A broad chest and heavy front end also change how a dog turns and lies down. If your dog is close to the maximum, still growing, or unable to lie flat without spilling over the side, move to a product whose stated limit gives you real headroom.
Practical rule: Your dog should stand, turn, and lie down comfortably, with little spare room to be thrown across the enclosure.
Two failures tell you to stop before judging fabric. If your dog's back presses hard against a rigid roof or upper rim, the interior is too small. If the empty seat slides on the cushion, the attachment or footprint is wrong. Fix size and anchoring first.
An unused seat solves nothing, either. In the 2026 AAA survey, 32% of dog owners allow their dogs to ride unrestrained or move freely throughout the vehicle. A wrong-size seat that's left in the trunk puts you in that group, so fit has to work on an ordinary Tuesday, not just on the day you unbox it.
Comfort Seats Versus Crash-Tested Restraints
A small-dog seat can do two very different jobs. Confusing them is where most safety claims go wrong.
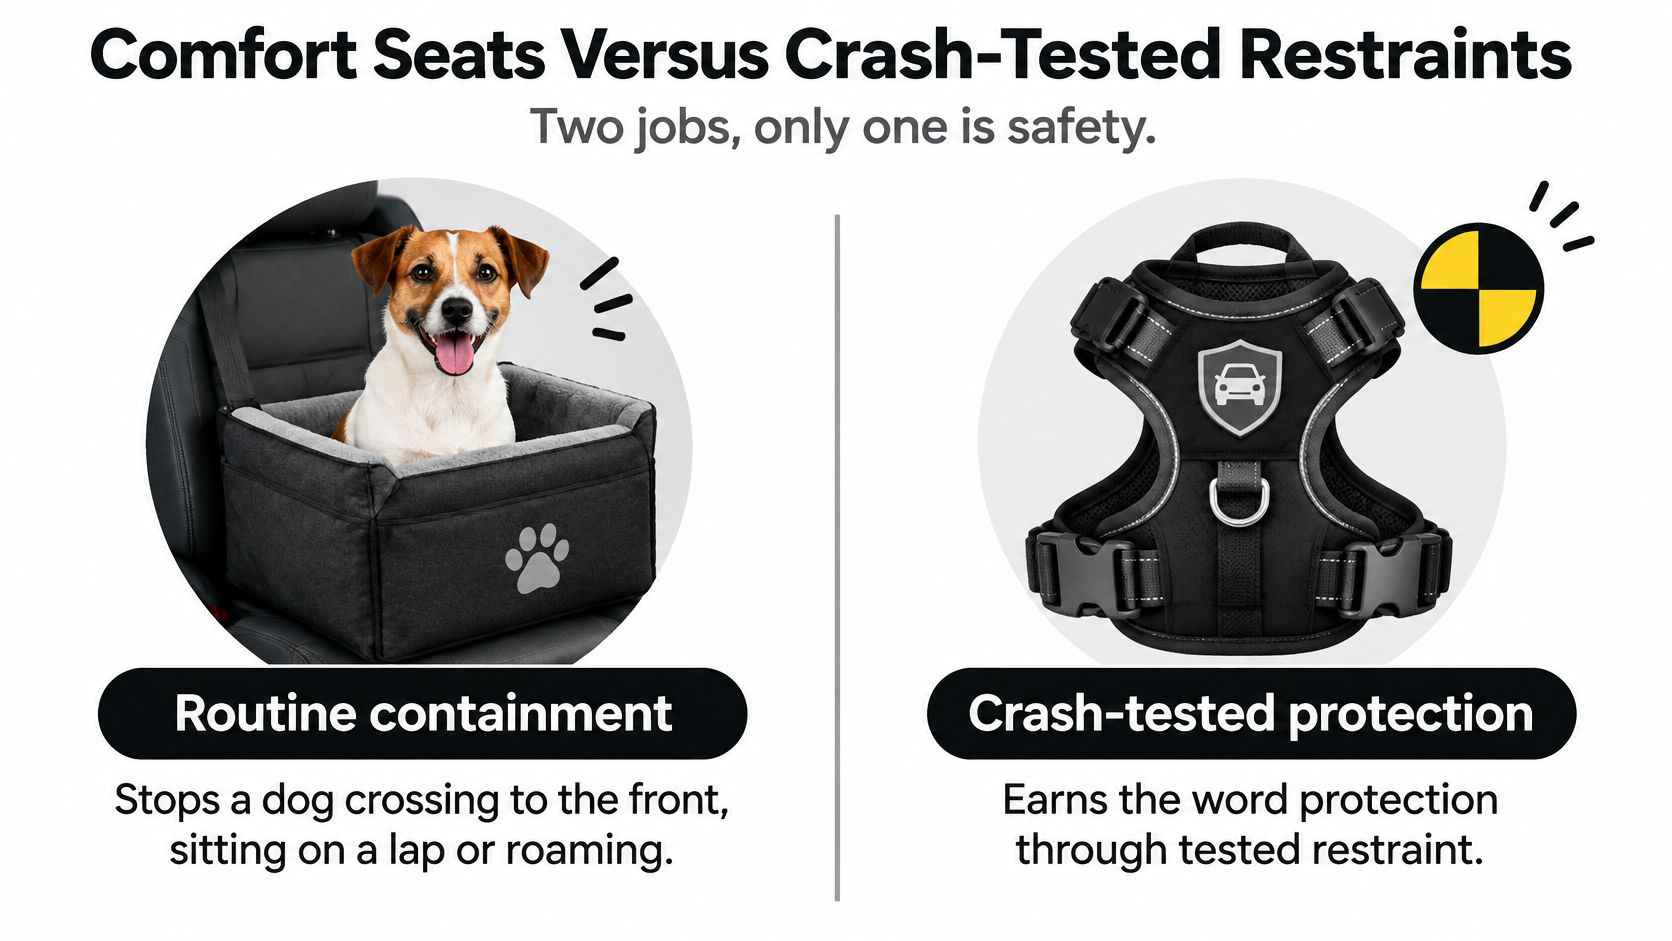
Job one is routine containment. The seat gives your dog a defined pocket in the rear, stops her crossing to the front or climbing onto a lap, and reduces sliding during ordinary braking. That matters because you drive better when you aren't reaching backward to retrieve a dog from the footwell.
Job two is collision protection. A quilted booster doesn't earn that label because it feels sturdy in your hands. Padding proves comfort. It doesn't prove that straps, stitching, and anchor points will hold under crash forces.
Ask What Test Was Actually Done
Independent testing gives you concrete questions to ask. Car and Driver's coverage of crash-tested dog restraints describes dynamic impact testing at 30 mph, measurement of forward excursion, inspection of carrier lift, and examination of stitching, zippers, and anchor points. A carrier can fail if the pet escapes, straps tear, or structural components don't remain intact.
The Center for Pet Safety is described in that coverage as using instrumented dog dummies and a 30-mph protocol adapted from Federal Motor Vehicle Safety Standard 213, the U.S. child-safety-seat standard. That's the kind of detail to look for: test speed, dummy weight, how the product was anchored, and whether it stayed intact.
Words such as "secure," "sturdy," or "safety seat" don't answer those questions by themselves. Keep two lists when you shop. Put washability, cushioning, and view height under comfort. Put test protocol, dummy mass range, attachment points, and post-test integrity under safety. For a deeper look at that distinction, see whether dog car seats are safe.
Placement Changes the Risk
Cornell's guidance on traveling safely with your dog recommends a crash-tested restraint and says that, when one is unavailable, a small dog's carrier should be secured on the floor behind a front seat because that position offers greater protection in a collision. The FDA guidance cited there warns that front-seat airbags can seriously injure or kill pets.
Where a small dog should ride
| Placement | Helps with | Collision trade-off | Rule |
|---|---|---|---|
| Rear-seat booster, harness tether, vehicle anchors | Routine movement and a view out | Higher position; only as good as the anchors and tether | Use when the system matches weight and attachment checks |
| Carrier belted on the floor behind a front seat | A secured enclosure when crash-tested gear is unavailable | Lower and shielded by the seat ahead; less view | Cornell fallback for a small dog |
| Front passenger seat | Looks convenient | Airbags can seriously injure or kill a pet | Do not use |
| Loose on a lap or free in the cabin | None | Dog becomes a projectile and a distraction | Stop the trip and restrain before driving |
Some dogs push you toward the carrier option. A dog who chews webbing, a flat-faced dog who overheats in deep plush, or a dog on a long, weak internal leash can turn a booster into a launch point. A steep rear cushion that lets the base rock creates the same problem. In those cases, choose the lower, belted carrier and accept the reduced view.
Rear-Seat Fit Before You Buy
A seat can match your dog and still fail in your car. Rear cushions differ in width, depth, slope, and belt placement, so measure the actual seating position before you order.
Start with a tape measure and your phone's notes app. You'll need five checks, and they take less time than a return.
Measure the Cushion, Not the Whole Bench
- Measure usable width and depth. Go from the seatback to the front edge of the cushion, then measure the flat width available for one seating position. Note any center fold, raised console hump, or lap-belt buckle that would sit under the base.
- Compare exterior dimensions. Match your numbers against the product label's exterior size, not the interior sleeping area. The base should lie flat without bridging a fold or hanging over the front edge.
- Check the slope. Set a flat board or hardcover book on the cushion and watch whether it tilts or rocks. A steep cushion lets a booster tip forward when your dog leans toward the window.
A seat that bridges a fold looks installed until your dog shifts her weight. Then one side drops, the tether angle changes, and the whole setup starts to walk. Flat contact matters more than squeezing the largest model into the space.
Check Belts and Front-Seat Travel
- Confirm the belt path is reachable. The vehicle lap belt or the product's straps must reach the marked path without twisting, riding over a buckle, or pulling at a sharp angle. Buckle it empty and tug before you commit.
- Move the front seat. Slide it forward and back through its normal range. It shouldn't strike a carrier, pin the booster, or block you from loading your dog calmly through the rear door.
If you have to force the base flat with one hand while buckling with the other, it isn't flat. Choose a different position or a different footprint.
Note whether your chosen position is lap-belt-only. Those setups depend more heavily on the product's own straps, so the anchoring check needs extra care and the tug test needs to be strict.
Keep the measurements with your dog's current weight. If you need a size exchange during a test window, you'll make the second choice from data instead of memory, and you won't repeat the same footprint mistake in a different color.
How to Install the Seat in the Rear
Use one repeatable routine and do the steps in order. Most installation failures come from a skipped check, not from a missing accessory. The sequence below assumes the footprint already fits your rear cushion.
AVMA guidance on pets in vehicles identifies a species-appropriate enclosure or safety harness as the preferred transport method and notes that available pet restraints lack the standardized regulatory framework used for human vehicle restraints. It also points to installing the seat in the rear passenger area, away from airbags. That lack of a single standard is why your own anchoring and tether checks matter so much.
The Seven-Move Rear-Seat Routine
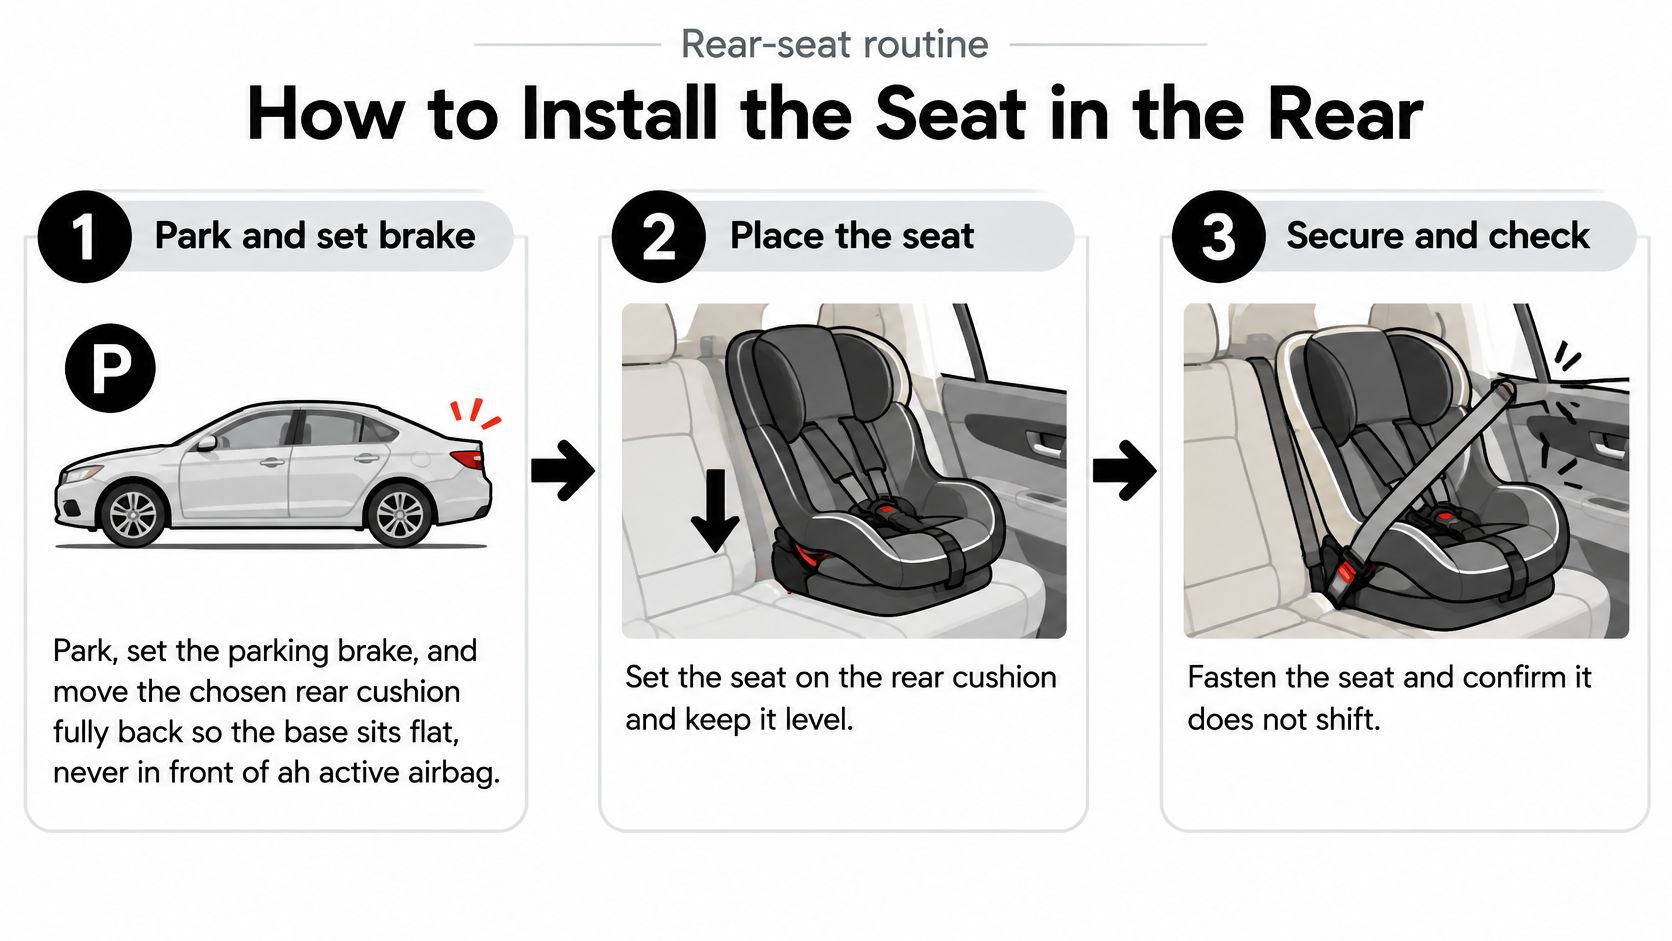
- Park and set the brake. Move the chosen rear cushion fully back if it adjusts, so the base sits flat. Never install in front of an active airbag.
- Center the seat on the cushion. Keep it off folds and buckles, with no gap under the base. A centered seat pulls straight when you tighten it.
- Route the belt through the marked path. Use the vehicle lap belt or the product's vehicle straps exactly where the label directs, then buckle. A belt draped over the outside holds nothing.
- Remove slack and tug. Press the base down firmly while tightening, the way you would with a child seat. Pull the shell forward, sideways, and up. It shouldn't rotate or walk across the cushion.
- Fit the harness. Adjust it so two fingers fit under the straps and the neck stays free. If you need a refresher, use this dog harness fitting guide. Never clip the tether to a collar, because a sudden stop would load the neck.
- Shorten the internal tether. Clip it to the harness back ring and remove excess until your dog can sit, turn, and lie down but can't reach the door, window switch, or front seatback.
- Recheck with your dog aboard. Confirm both buckles, look for twisted webbing, and repeat the tug test before the first drive.
The Three Slips That Undo the Setup
A long tether loop lets your dog gain momentum inside the box before the restraint catches. Shorten it while she's lying down, not while she's standing at full stretch.
A belt that only crosses the front of the seat creates the appearance of security. If it isn't through the marked belt path, start over. The same applies to chewed or frayed vehicle webbing, which shouldn't be trusted to anchor anything. If your dog has already damaged a belt, look into how to fix pet-damaged seatbelt webbing before relying on that seating position.
A front-seat install trades a better view for airbag exposure. Don't make that trade for a short trip.
Finish with a 10-minute driveway check. Sit your dog in the belted seat, clip the tether, and watch whether the base creeps as she turns and settles. If it moves, restart at the belt path. Don't stuff blankets underneath to level it, because soft fill compresses and hides the problem.
Short Drives for Nausea and Anxiety
Many small dogs need a training plan more than another pillow. A plush seat can make practice rides more tolerable, but it can't teach your dog that the car is safe, and it can't stop motion sickness that's already underway.
First, separate two problems that look similar from the driver's seat. Motion sickness tends to show up once the car moves, as drooling, lip licking, swallowing, or vomiting. Anxiety often starts earlier, as panting, pacing, trembling, or refusing to approach the car door before the engine runs. Some dogs have both, which is why naming the pattern matters.
VCA guidance on motion sickness in dogs recommends several short practice trips and gradual acclimation to a carrier or harness, with veterinary help when drooling or vomiting occurs. It specifically notes that anti-motion-sickness drugs do not treat anxiety. PDSA guidance in that summary recommends starting with journeys of no more than five minutes, while Cornell advises avoiding food for four to six hours before travel.
A Calm Build-Up Protocol
Start at home, away from the car. Let your dog wear the harness indoors for short, rewarded sessions until putting it on is boring. Then move to the parked car with the seat already belted in the rear. Clip the tether, sit for a few calm minutes, and get out before your dog escalates.
When parked sessions are easy, drive for no more than five minutes and return home before distress peaks. Repeat the same short loop several times. Add duration only after easy reps, not after one heroic trip where your dog merely endured it. These tips for traveling with pets fit well alongside that gradual routine.
On the day of a planned trip, skip food for four to six hours beforehand while keeping water available. Keep the cabin cool and ventilated, but don't blast air into your dog's face or let her hang her head outside. Flying debris and a fast-moving view can make a sensitive dog worse.
For longer days, stop about every two hours for a drink, a toilet break, and a short sniff on leash. Never leave your dog waiting in a closed car in heat while you run an errand.
Car distress signs and what to change
| What you see | More likely problem | Next change |
|---|---|---|
| Drooling, lip licking or vomiting on the move | Motion sickness | Withhold food 4 to 6 hours; ask a vet about anti-nausea medication |
| Panting, pacing or refusing the car before it moves | Anxiety | Short parked sessions, then trips of no more than five minutes |
| Both vomiting and door refusal | Overlapping problems | Do not expect a nausea drug to calm fear; get a veterinary plan |
| Calm at home but worse with a high view of traffic | Visual overstimulation | Lower the viewpoint or cover the side gap and shorten the route |
If anxiety remains the main barrier after gradual practice, talk with your veterinarian before adding products to the plan. Reading about choosing supplements for a nervous dog can help you prepare questions, but it shouldn't replace a diagnosis of what's driving the behavior.
A dog who vomits on the first highway trip doesn't need a higher view of traffic. She needs the plan restarted at a level she can handle.
Fabrics Cushioning and a Wash Routine
Treat fabric as a comfort and hygiene choice, not as proof of crash protection. The lining decides whether your dog settles and whether you'll keep the seat clean enough to use every week. The hardware decides whether the setup stays put.
What to Feel and Flex in the Showroom
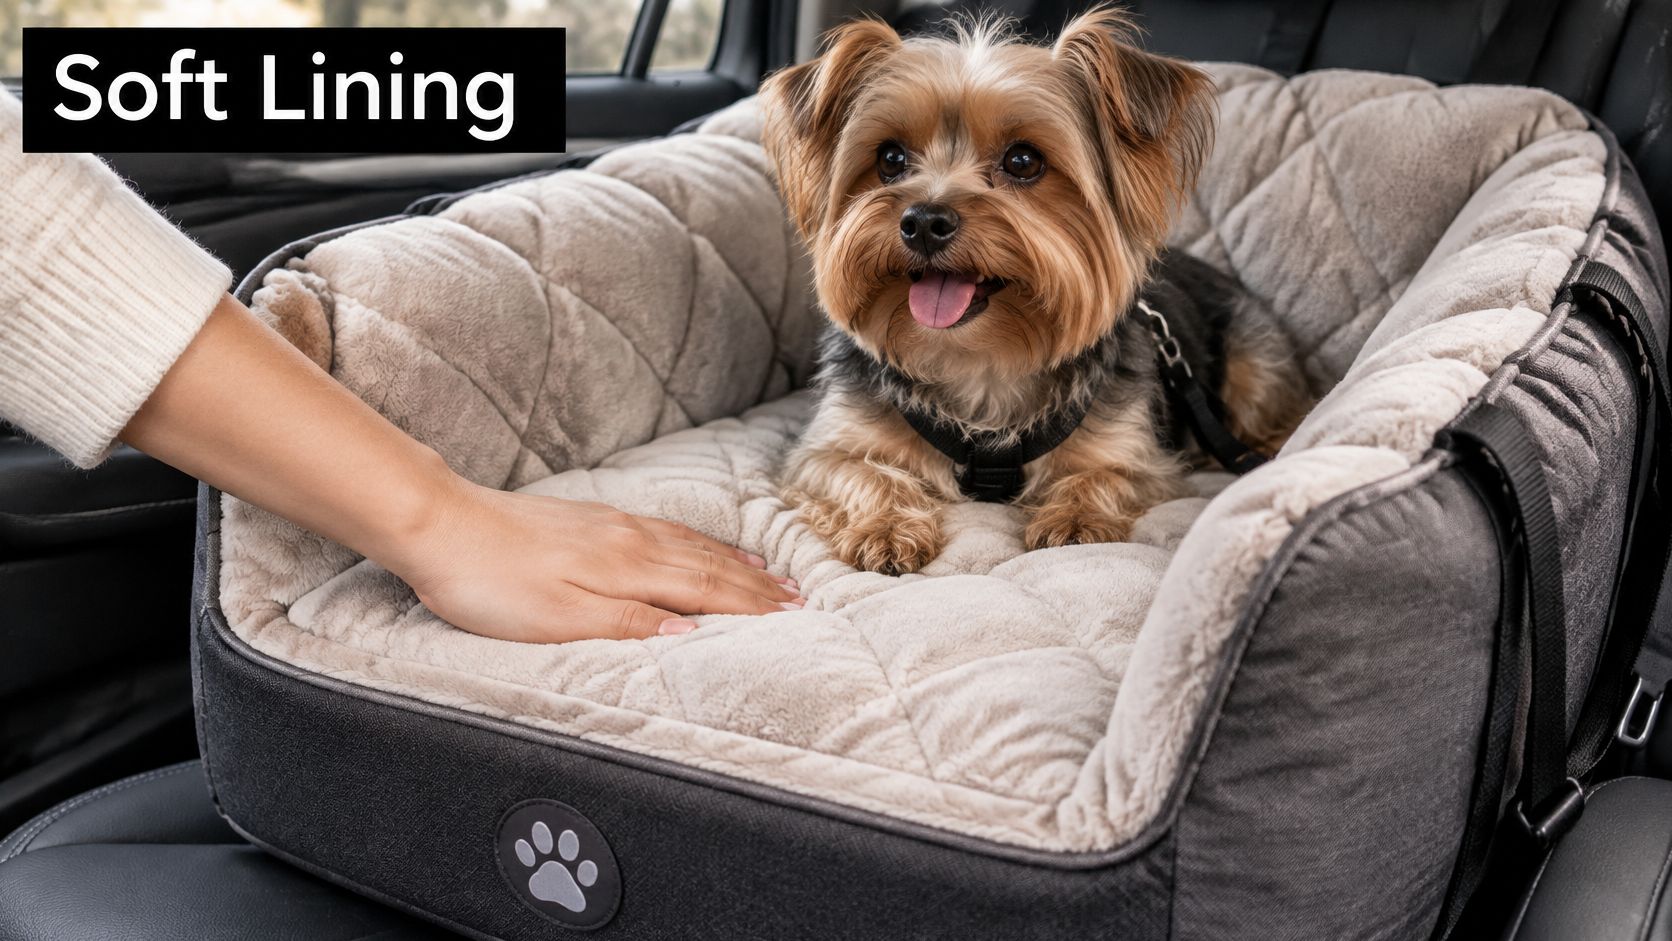
A quilted micro-plush or similar soft lining gives a toy dog a nest and removes the startling slide of a slick plastic tub. Press it with your palm. It should cushion without bottoming out instantly. Then remember the trade-off: plush holds heat and dander, so a small raised seat parked in summer sun can become a hot pocket within minutes.
Look for a stable base or stiffener that keeps the bed from collapsing into a hammock. Squeeze the side walls and floor together. If the whole structure folds easily in your hands, your dog's shifting weight will fold it in the car.
Check airflow next. Mesh or a vent panel helps a dog who pants in a deep, enclosed seat. The rim should be high enough to block a door gap, but not so high that your dog rests her chin on a hard edge for the whole ride.
Hardware deserves more attention than the pattern:
- Bar-tacked tether points: Look for dense, reinforced stitching where the tether meets the seat.
- Metal harness ring: Choose metal over a thin plastic loop for the clip connection.
- Flat, untwisted straps: Webbing that twists into a narrow rope concentrates force and works loose faster.
- Covered zippers: Covers keep teeth and tongues away from zipper teeth and pulls.
Clean by Mess Type
Shake out hair after each trip so it doesn't mat into the plush. Blot urine, drool, or vomit the same day, before liquid wicks through the lining into foam where odor is hard to remove.
If the cover is removable, wash the cover and air the base separately. If the whole seat is the washable unit, follow the label exactly and skip hot cycles and high dryer heat, which can warp stiffeners and damage elastic. Let the seat dry fully before reinstalling it, because a damp base can smell and slip.
A waterproof liner under the plush helps with carsick dogs, but only if it lies flat. A bunched liner becomes a slip plane between your dog and the cushion, so smooth it after every wash.
Know when washing isn't the answer. Frayed tether webbing, a cracked buckle, or a base that folds in your hand means retirement, not stain treatment. Replace the seat or the failed manufacturer part before the next drive.
Match a Nandog Seat and Test the Fit
Apply the weight bands and rear-seat checks to one actual order. Current scale weight comes first, breed examples second, and the printed limit is the stop line.
For dogs up to 15 lb, such as Yorkshire Terriers, Chihuahuas, and Pomeranians, our Small car seat measures 20 by 16 inches on the exterior. For dogs up to 30 lb, such as French Bulldogs, Pugs, Beagles, and Shih Tzus, the Medium measures 22 by 18 inches.
The split needs one careful check. Small covers dogs up to 15 lb, but a dog under 8 lb should still pass the compact fit test: she can stand, turn, and lie down without climbing the rim or swimming in spare floor space. Confirm the interior works for your toy dog before you assume the weight limit alone settles it.
Choose by Today's Weight
If your dog sits between sizes or is still growing, choose from current scale weight, not the breed example on the label. Then stop using a size the week your dog passes its printed limit. A Beagle puppy, for example, may start within a limit and outgrow it quickly, so put a reweigh date on your calendar.
Our car seats include a harness hook and belt straps for the rear-seat setup. Use the vehicle straps first, fit the harness with room for two fingers under the straps, then clip the short tether to the harness rather than a collar. Treat the quilted micro-plush interior as the comfort layer that helps practice rides feel familiar. Don't treat it as crash-test evidence.
Use the First Day as a Test, Not a Road Trip
We offer a 100-day test drive on all car seats. That's long enough to run parked sessions, build through five-minute trips, and wash the seat after the first messy ride before deciding the size is wrong.
Order from nandog.com and weigh your dog again the day the box arrives. Belt the seat in the rear, confirm the base sits centered with no gap underneath, clip the harness with a short tether, and take one loop around the block.
If the base walks, the tether stays slack, or your dog can't lie down without pressing into the sides, exchange sizes during the test window. Don't add blankets to disguise a footprint or interior that doesn't fit. Confirm the exterior dimensions and 100-day test-drive terms against the live listing before you buy, so the seat you test is the seat you intended to order.
We design car seats for small dogs who need a contained, comfortable rear-seat place to settle, with quilted micro-plush comfort, a harness hook, and belt straps for a secure everyday setup. Choose Small or Medium from your dog's current weight, run the stand, turn, and lie-down test at home, and use the 100-day test drive to confirm the fit on real short drives. Visit Nandog Pet Gear to find the size that matches your dog and your car.