


Your dog is bouncing off the hallway walls, the leash is somewhere under a shoe, and the front door is already open. You reach for the collar, the dog ducks, the harness twists, and one excited lunge turns a simple clip into a wrestling match. Learning how to put on a dog leash safely starts before the snap hook touches the ring.
The right routine combines suitable equipment, a secure fit, calm handling, and a controlled exit. A leash should give you connection without choking, twisting, or creating a new escape route. It should also help your dog begin the walk in a state where learning is possible.
Why Calm Leash Attachment Matters Before You Step Outside
A dog that rushes the door can jerk your hand before you have a secure grip. Puppies may spin under the leash, while anxious rescues may back away from a harness and tighten its straps unevenly. If you rush through the attachment, jumping, twisting, and pushing toward the exit can become the routine that starts every walk.
The risk affects the person holding the leash as well as the dog. A 2024 analysis cited in the Journal of the American Veterinary Medical Association found about 105 leash-related injuries per 1 million people in 2018, roughly 1 in 10,000 individuals, with injuries estimated to have increased about 2.6-fold from 2004 to 2017 (Journal of the American Veterinary Medical Association analysis). Reported injuries include fractures, sprains, and traumatic brain injuries, with older adults affected disproportionately in some datasets.
The doorway is part of the walk
Attach the leash while your dog's feet remain on the floor and your weight stays balanced. Stand beside the dog instead of bending over its face. Hold the leash in one hand with the clip controlled in the other. That setup limits sudden pulls through your fingers and keeps the hardware from skittering across the floor.
Practical rule: If attachment requires chasing, pinning, or repeated grabbing, pause the walk and change the setup.
Before opening the door, check three things: the collar or harness sits in the intended position, the clip is fully closed, and the dog cannot reverse out of the restraint. Run your fingers along the straps. A twisted band, loose buckle, or attachment point pressing against the wrong area is easier to correct in the hallway than on a crowded sidewalk.
The doorway routine also helps prevent the first surge from becoming a physical struggle. Wait for a brief pause, keep the leash short enough for control without constant tension, and release the door only when you can maintain that position. Calm handling gives you time to catch a slipping collar, a shifting harness, or a dog beginning to back out.
Leash-related injuries occur commonly at home, followed by streets, highways, and other public property, according to the same review. The hallway, porch, lobby, or driveway therefore belongs in the safety plan. A controlled attachment protects both ends of the leash before the walk has properly begun.
Choosing the Right Attachment for Your Dog
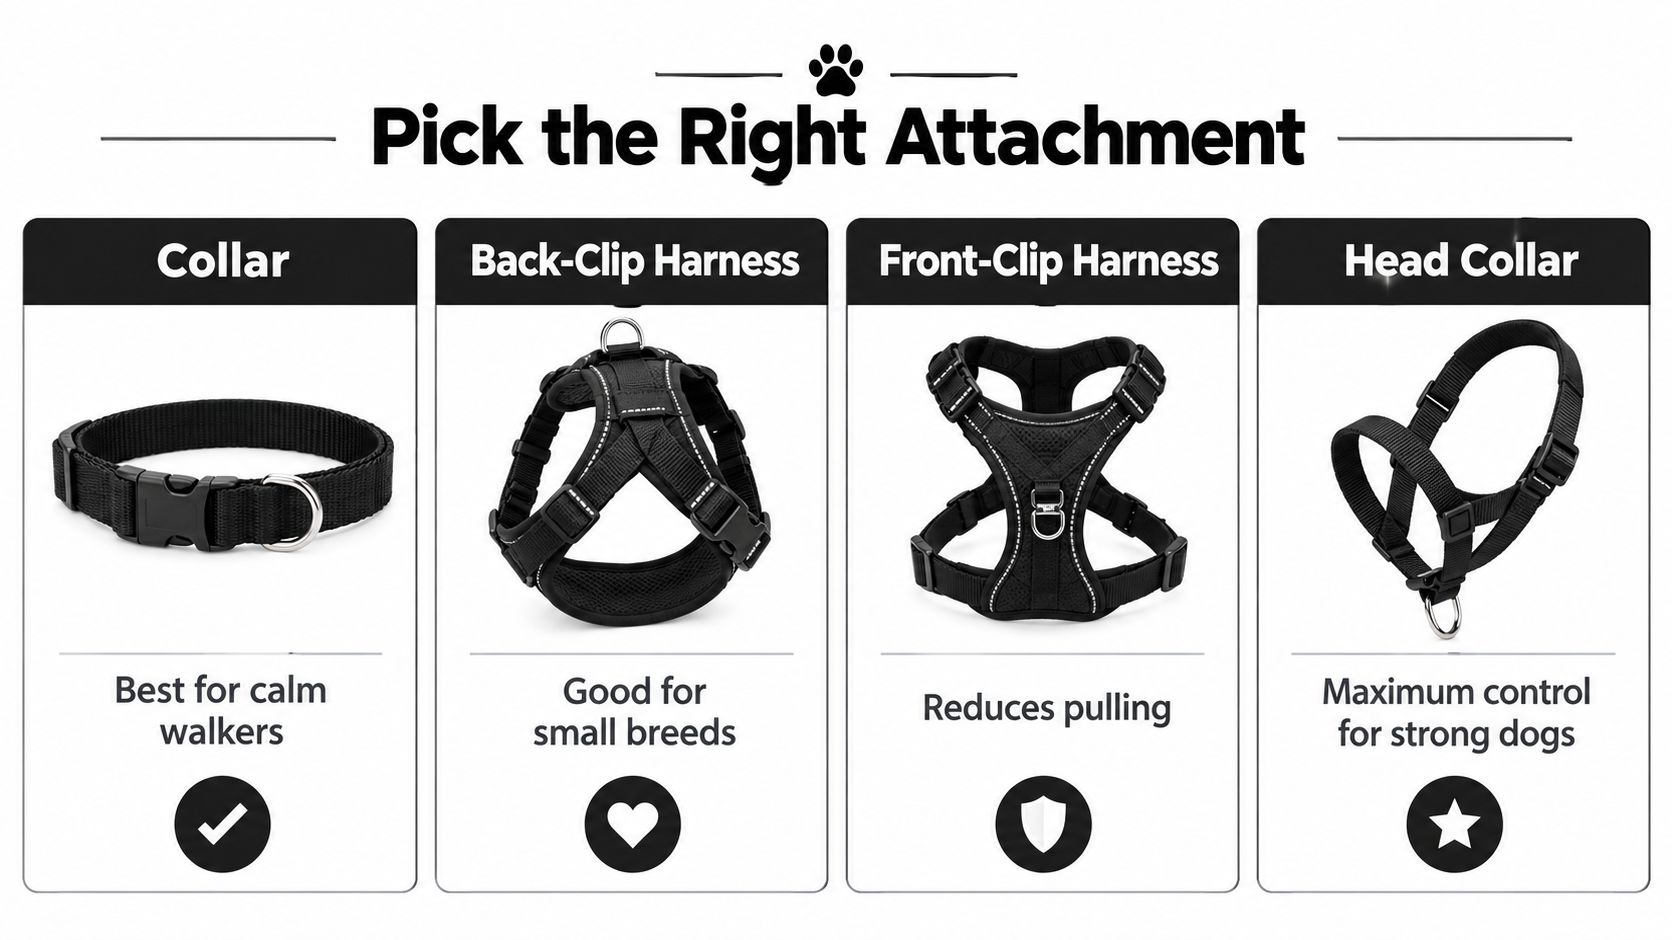
A dog that backs out of a collar, twists a harness, or chokes when pulling needs a different setup before the leash is clipped. Choose according to your dog's neck, body shape, movement, and pulling pattern. Collars, back-clip harnesses, front-clip harnesses, and head collars direct force differently, so the attachment point matters.
| Attachment | Useful when | Watch carefully |
|---|---|---|
| Collar | Your dog walks calmly and the collar fits securely | Neck pressure, slipping, coughing, or backing out |
| Back-clip harness | You want body contact and a familiar attachment point | Pulling can remain powerful, and straps can shift |
| Front-clip harness | You need more influence over a dog that leans into the leash | Poor positioning can twist the harness or affect movement |
| Head collar | A strong dog needs close control under careful conditioning | Dogs may resist it, and sudden pressure can be uncomfortable |
A collar suits a calm, trained walker when it sits high enough to remain secure without pressing into the throat. Check that the dog cannot pull its head through the opening. If coughing, gagging, or repeated neck pressure appears, stop and reassess the fit.
A back-clip harness places contact across more of the body, but it does not automatically reduce pulling. In some conditions, dogs have pulled with greater mean force in harnesses than collars, so select and fit the harness for the individual dog rather than treating it as a universal answer (review of leash-walking equipment and physical effects).
A front-clip harness changes the direction of the connection when the dog moves ahead. It can make steering easier, provided the chest strap stays centered and the side straps remain clear of the shoulder joints. A harness that rides toward the throat or twists under tension needs adjustment before use.
A head collar requires gradual conditioning and careful handling. Sudden pressure can make a dog resist, so it is a poor choice for rushed clipping or hard leash corrections.
Dogs with short muzzles, neck sensitivity, eye concerns, or unusual proportions need extra caution. Ask your veterinarian or a qualified force-free trainer to help assess the safest option, especially if your dog shows discomfort or changes its gait.
For help matching the collar and leash, see this guide to a dog collar and leash combination. Before attaching the leash, confirm that the restraint lies flat, buckles are closed, and two fingers fit between the material and your dog without leaving a large escape gap.
How to Put on a Dog Leash With a Collar or Harness
Start with the leash in your hand before you approach the dog. Fold or gather the excess line so it doesn't drag across the floor, and hold the handle securely without wrapping it around your wrist. Keep the snap hook facing away from the dog's face. That small change prevents the metal clip from startling a nervous dog.
Attaching to a collar
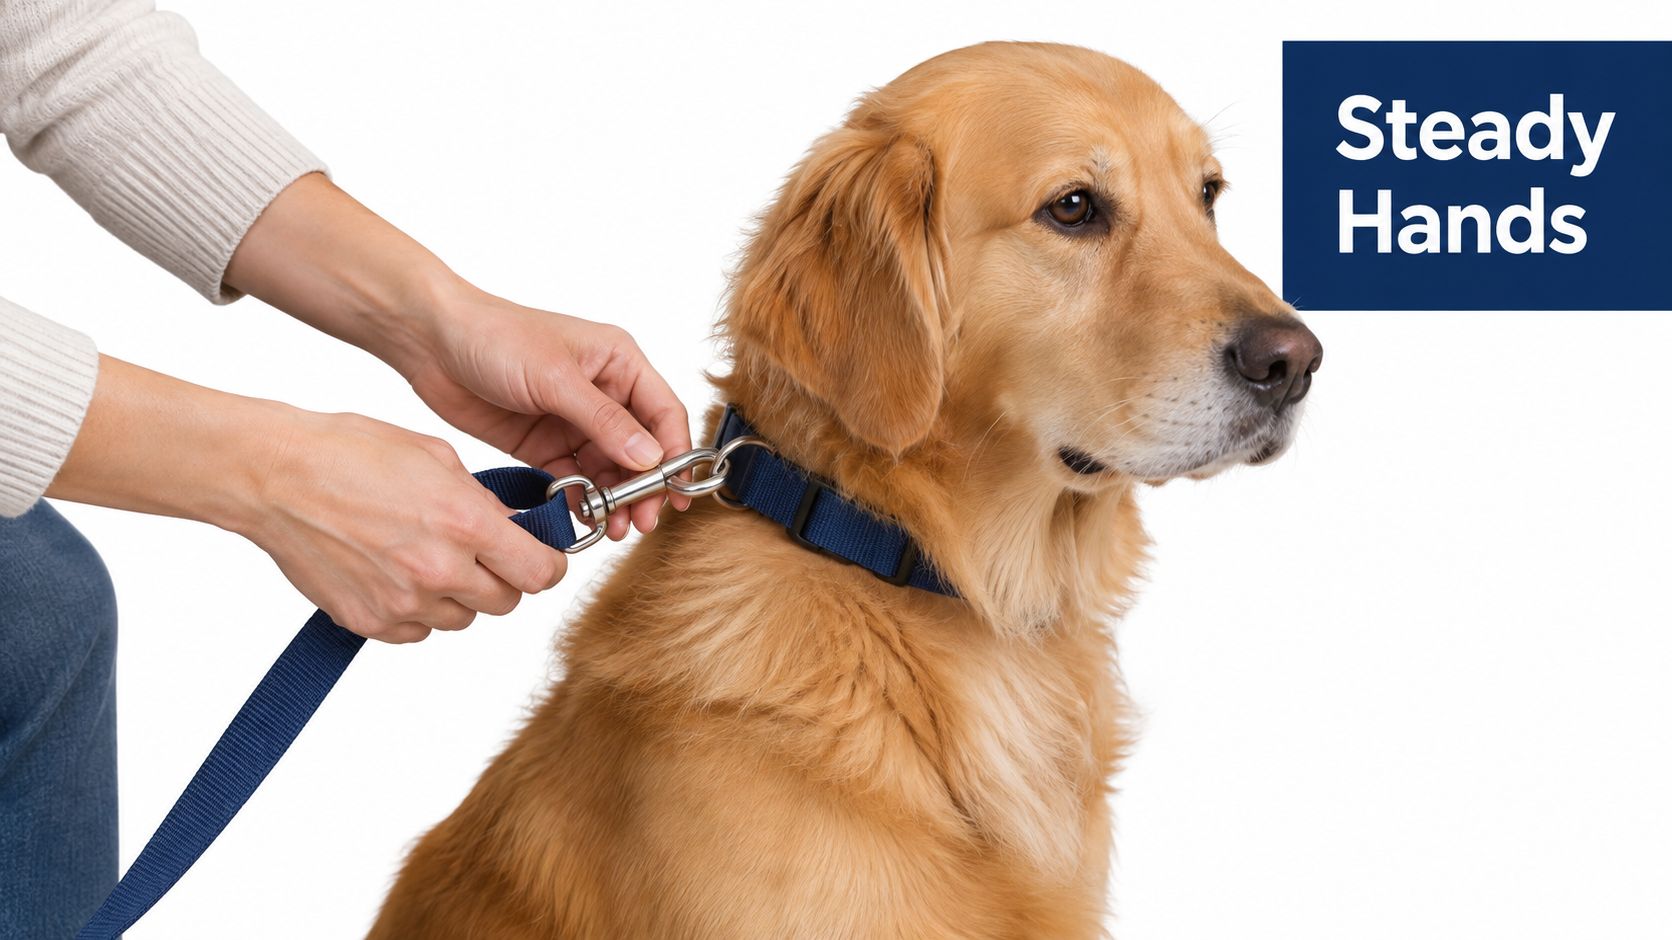
Let your dog stand or sit beside you. Find the metal D-ring rather than clipping to a decorative loop, tag ring, or buckle. Bring the clip from the side, squeeze the gate open, place it through the D-ring, and release it only after the hook has closed fully.
Run your fingers around the connection. The gate should be shut, the ring should sit inside the hook, and the leash shouldn't be caught on the collar buckle. Give the leash a gentle test while keeping slack available. Don't yank the collar to test it.
Attaching to a harness
Put the harness on according to its design. For an over-the-head style, guide the neck opening over the head without dragging it across the eyes, then bring the chest and belly straps into place. For a step-in design, position the openings under the correct front paws, lift the sides, and fasten the buckle on the back.
Straighten every strap before attaching the leash. The chest piece should be centered, the back panel should lie flat, and no strap should cross the windpipe or cut across the front of the shoulders. Adjust the harness until you can fit two fingers between the material and the dog's body. If your whole hand fits easily, the harness may be loose enough for an escape.
A nervous dog may do better with a harness that opens at the neck instead of requiring the head to pass through a fixed opening. If you're arranging a coordinated look for a dog event or photo session, commissioning pet clothing can be considered separately from walking equipment. Clothing must never cover, obstruct, or interfere with the restraint.
This guide to putting on a dog harness can help you identify the straps and attachment points on common designs.
Before opening the door, check: flat straps, closed buckles, two-finger fit, centered attachment, fully closed snap hook, and a leash grip you can release quickly if needed.
A short visual demonstration can help you compare hand position and clip placement:
Hold the leash with a soft bend rather than a tight line. If your dog moves ahead, keep your feet under you and turn or pause without jerking. The restraint should guide the dog, not become a launch point for a tug-of-war.
Preparing Your Dog for a Smooth Leash Moment
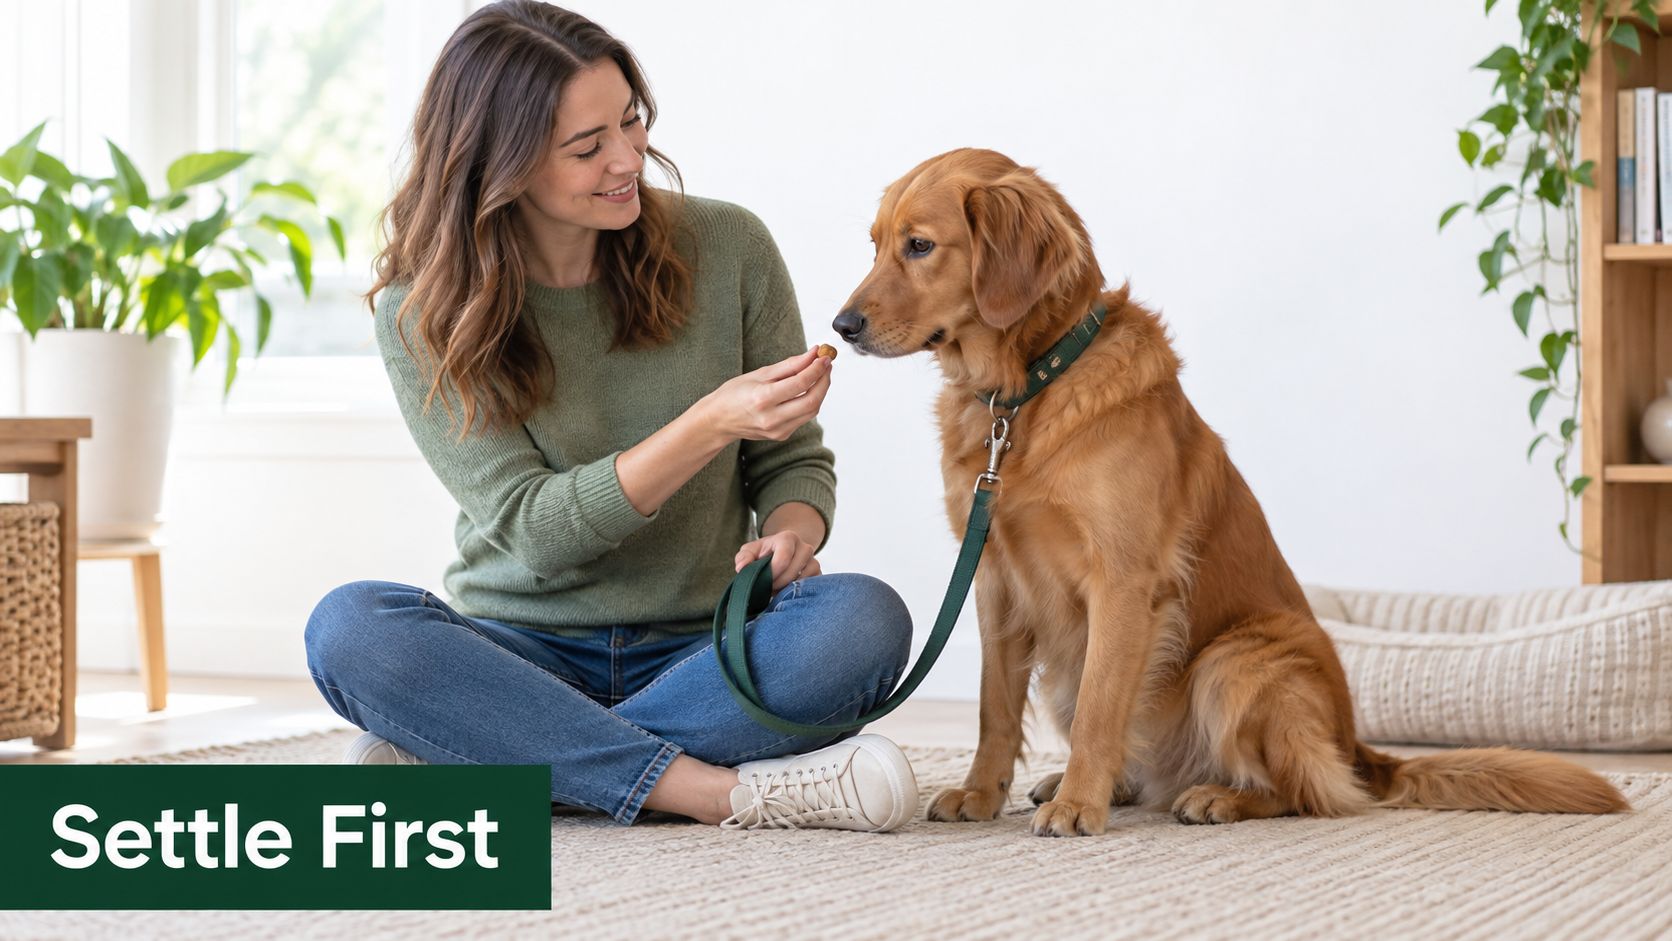
Equipment works better when the dog has a predictable routine. Before you pick up the leash, lower the energy in the room. Ask for a sit if your dog knows it, or wait for four paws to settle, then reward that stillness.
Present the leash only after the dog can look at it without launching upward. Move slowly, touch the collar or harness, reward, and remove your hand. Repeat until those small contacts stop causing a jump or retreat. You're teaching the dog that restraint handling is ordinary and safe.
Match the routine to the problem
A puppy that mouths the leash needs a replacement behavior. Keep a small treat near your working hand, reward the puppy for looking at you or holding still, and move the leash only during that calm instant. If teeth touch the leash, don't snatch it away or pull back, because the movement can turn the leash into a game. Freeze the line, wait for release, then reward quiet behavior.
A rescue dog that backs away needs distance and choice. Place the harness on the floor, reward investigation, and build contact gradually. If the dog leaves, let the dog leave. Chasing with a harness in your hand can make tomorrow's attempt harder.
An apartment doorway adds elevator sounds, neighbors, and narrow spaces. Attach the leash away from the threshold, keep the dog beside you, and open the door only when the leash is secure and the dog's body is settled. If the dog surges, close the door calmly and reset rather than trying to win a pulling contest in the hallway.
Research supports treating attachment as a real handling challenge. In a 2024 U.S. survey, 32.79% of dog guardians reported leash pulling as a problem, while shelter-dog observations found pulling during leash walks in 86% of dogs and jumping during harnessing in 45% (AVMA survey and shelter-dog observations). A brief settle routine addresses the moment before those behaviors gather momentum.
Troubleshooting Fear Wriggling and Escape Attempts
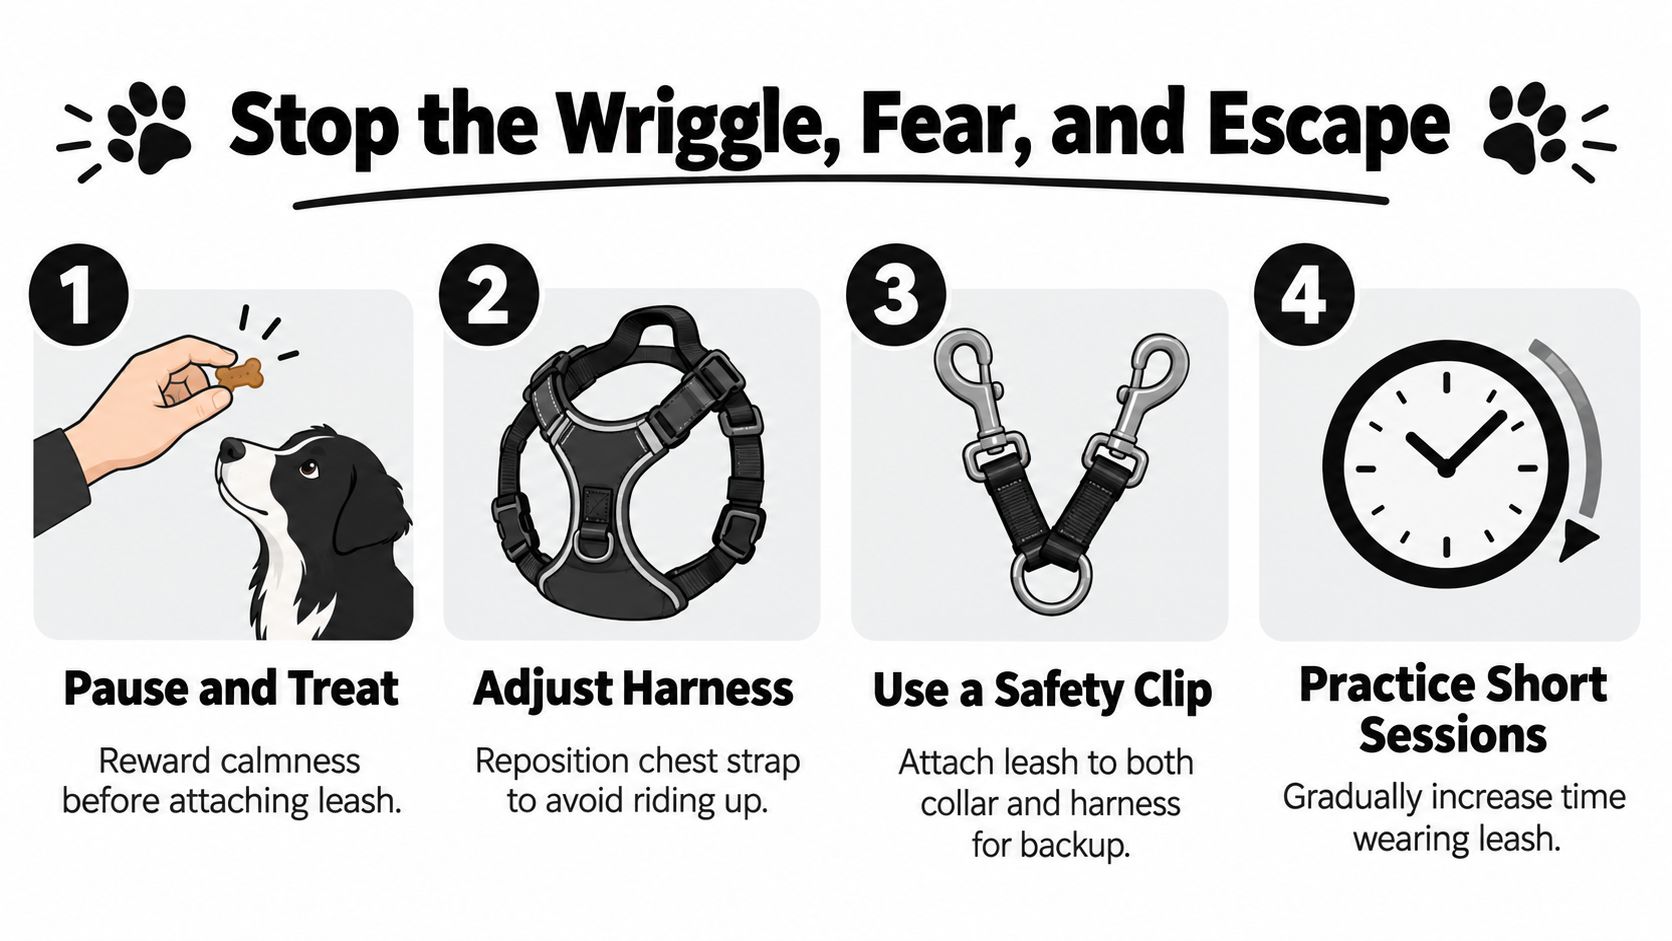
A dog that wriggles isn't always being stubborn. The harness may be twisted, the chest strap may be too high, the clip may be approaching the face, or the dog may have learned that backing up makes the equipment disappear. Solve the mechanical problem first, then work on the emotional response.
When the harness rides up
Stop moving forward. Slide the harness back into its intended position, center the chest panel, and check whether the neck opening is sitting too close to the throat. Adjust each strap while the dog is standing naturally, not while the dog is crouched, twisting, or reaching for a treat.
A harness that looks secure when standing may shift when the dog pulls. Watch the strap at the armpits and shoulders, and confirm that the leash ring remains where the design places it. If the dog can reverse out, don't rely on a tighter leash. Refit the harness or use an appropriate backup connection while you seek professional guidance.
When your dog backs away
Move sideways rather than following directly behind. Offer a treat toward your body, reward forward movement, and handle the harness in short repetitions. Never drag a frightened dog toward the doorway.
For dogs that need a cleaner, easier outdoor transition, a secure yard surface such as artificial turf for muddy yards can reduce the mess and pressure around quick bathroom trips. It doesn't replace leash training, but a calmer environment can make practice easier.
When the leash goes tight
A tight line can destabilize both dog and handler. In a force study of dog walking, half of participants experienced leash tension of 125 N or greater, and the largest recorded pulling event reached 412.5 N, with a loading rate of 2868.7 N/s (study of leash tension and gait changes). The same work found changes in stride-time variability and other gait measures while participants walked a dog.
Use a shorter working length without wrapping the leash around your hand. Turn your body, soften your elbow, and reward the moment the line loosens. A structured loose-leash protocol can outperform passive stopping alone. In one controlled training study, the “Major-Minor Walking Program” produced mastery for all dogs in that condition in an average of about 43.75 minutes, while “Penalty Yards” also reached mastery but took about 60 minutes; “Make Like a Tree” produced no mastery (controlled loose-leash training study).
For equipment and pulling considerations, review this guide to a dog leash for pulling. Choose a method that changes the dog's behavior rather than depending on repeated force.
Quick Tips for a Safer More Enjoyable Walk From the First Clip
A smooth leash start comes from several small checks done in the same order. Fit the restraint before the dog becomes excited, attach from the side, and keep the leash gathered so you're never searching for the handle as the door opens.
Use this quick pre-walk check:
- Fit: The collar or harness lies flat, leaves room for two fingers, and cannot slide over the head.
- Position: The chest strap avoids the throat and shoulder joints, while the chosen ring sits where the design intends.
- Connection: The snap hook is fully closed around the correct D-ring.
- Grip: The handle is secure but not wrapped around your wrist or fingers.
- Doorway: Your dog has four paws down before the door opens.
- Training: You reward slack and calm movement instead of waiting for a pull and then relying on a sudden stop.
Practice indoors when you aren't late. Attach the restraint, walk a few quiet steps, reward a loose leash, and remove it before your dog becomes frustrated. Repeat the same calm sequence in the hallway, then near the building entrance, then on a busier route. Short, successful practice gives your dog a clear pattern to follow.
The best leash setup is the one that fits the dog, supports the handler, and allows calm communication. Recheck it whenever your dog grows, gains or loses body condition, changes equipment, or begins escaping from a restraint that used to fit.
Nandog Pet Gear offers collars, leashes, harnesses, and other everyday pet accessories designed around practical comfort and modern home and walking routines. Visit Nandog Pet Gear to choose walking equipment that supports a secure, calm start every time you head outside.